
The Brief

My First thoughts about the brief and reflecting back…
Completing this 3rd part of this course has actually taught me a lot more about the grid system and layouts than what I already knew and it has helped me to develop my knowledge more which made this assignment much more enjoyable and I am very pleased with the finished designs and finished books!
I started to brainstorm ideas for what content to put inside of my books one late night whilst I had to sit in my car ALL night and wait patiently for my fiance in A&E! (minor accident, few tetanus jabs later!..) It worked out quite well though because I watched a few videos (until about 4am!) on LinkedIn by a really quirky dressed American Graphic Design teacher about typography which really helped me to create the written content for my pages:


The main topics that I was considering were:
- Contrast
- Grid
- Kerning/Tracking
- Skipping a weight
- no more than 3 fonts
- Justified left, ragged right
- Readability-clarity-legibility
- negative space
- Hierarchy
- Bad typefaces – Comic Sans, Papyrus
- Not distorting type
- Typos
- Widows/orphans/rivers
- Fonts matter
There was a lot of rules that I could use in my books! I was worried though that my books were only 8 pages! This meant that I could only be allowed 3 double pages in each book and I knew that I would be writing and designing for one rule per each double page spread which meant I had to choose wisely! I didn’t want to cram loads of information over single pages. This would mean that I would have to choose a few rules that are similar and could be classified under the same subject: E.g – I decided that skipping a weight, choosing 1 typeface but different fonts within the same typeface and using contrasting colours would all come under the rule and the “creative umbrella” that is Contrast. Skipping a weight creates contrast as does choosing different fonts within the same family and using contrasting colours.
I had designed similar in Core Concepts for “If the Face fits” – a typeface sample book and I really loved that exercise! I was really pleased with the layouts that I produced for it and I knew that I had a lot to compete with for this assignment! I wanted to at the minimum achieve the same results as last time if not excel and design and create something that has developed and grown since then! The layouts for my type specimen book were very clean, minimal and spacious.
I have to admit I felt threatened by the title “My little Book of Good typography”, I felt frozen by the fear to get started for fear of attempting to create a book on Good typography but it ending up being bad! I was worried that what I have learned so far would be good enough to create a title of this nature! At the same time I was also worried about creating a book on bad typography because I am such a perfectionist that I really struggle to do things bad!! There was a lot of growth and development within this assignment; as my Fiance said – “It has travelled far”.
Let’s see where it went…
Research
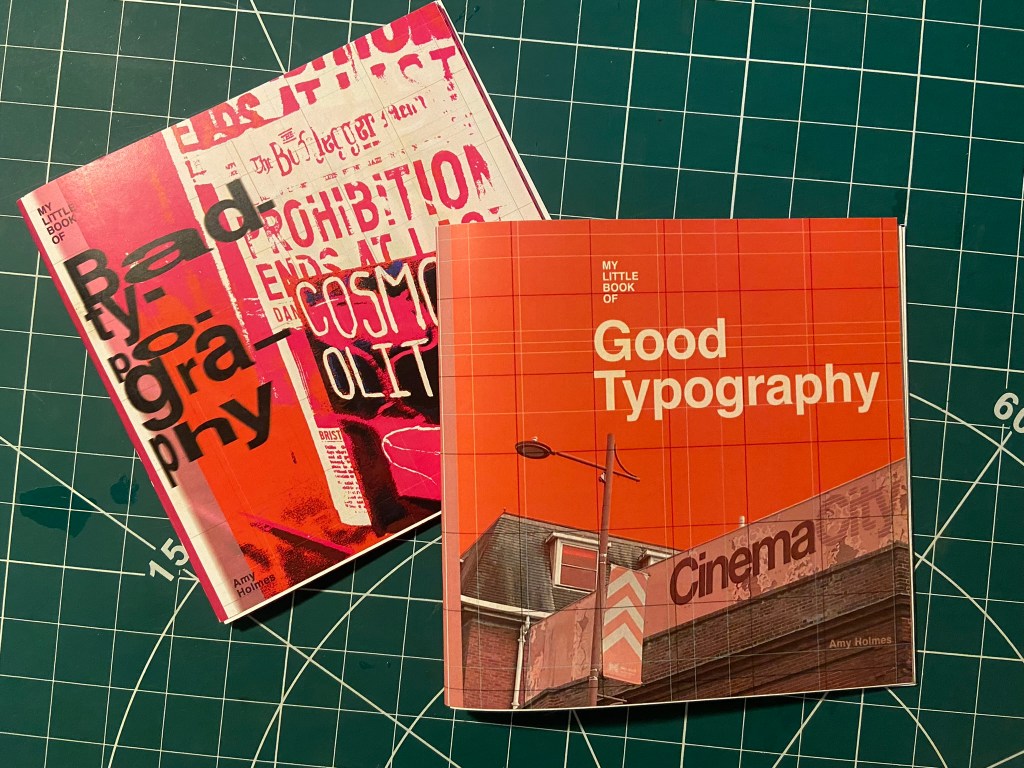
As I mentioned above I did a lot of researching into potential topics to use within my books in the early morning of a night sat in my car at A&E! Watching them videos though was helpful and I did pick things up that I didn’t already know! – Type classification and how to choose typefaces that contrast and work with each other. I also did a search on good and bad typography books and stumbled upon a book from Craig Ward, (which looking back now I have only just realised that I used his quote on the back of my Good typography book!) his book called “Popular lies* about Graphic Design” intrigued me as I liked the look of the clean, minimalist layouts and it was also a small, pocket sized book which closely matched the brief of this assignment.
When I first saw the brief for this assignment I was hell bent on creating ugly pages using Comic Sans as this is one of the most hated typefaces but It was after reading one of the articles in his book that I decided against it; it made me rethink that is it actually hated or is it just massively used and overused in the wrong context that just winds people up?… A victim of misuse! It was a debate that I actually couldn’t justify using in my books in the end plus it seemed too cliched; I imagine everyone would have that appear in bad typography.

Craig Wards book basically highlights popular Graphic Design rules and pulls apart whether they are actually tried, tested and they work or whether they are just “lies”.


These experimental layouts then lead me to remember about another book that graces my bookshelf:
“Show your work” by Austin Kleon, it is another little book full of simple layouts aiming to boost creativity and confidence.


Taking into account the feedback I received from my tutor on my Handsmaids Tale book (where I created a mockup of my design on a square book) where my tutor suggested that not many books are squared and I may wish to rethink my decisions for future books – I looked at this little book which is squared and figured that this assignment might be an exception to the rule – I actually took a risk and using the same measurements as Austin Kleons book I used the same measurements to create mine further on into the assignment.
It started with 2 photographs…
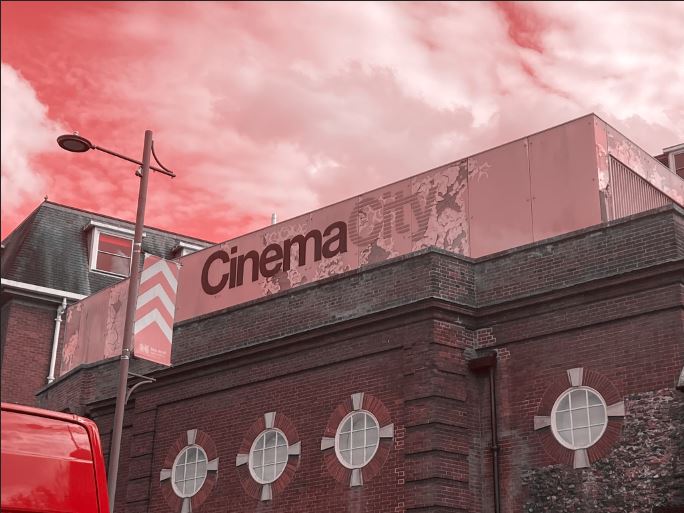
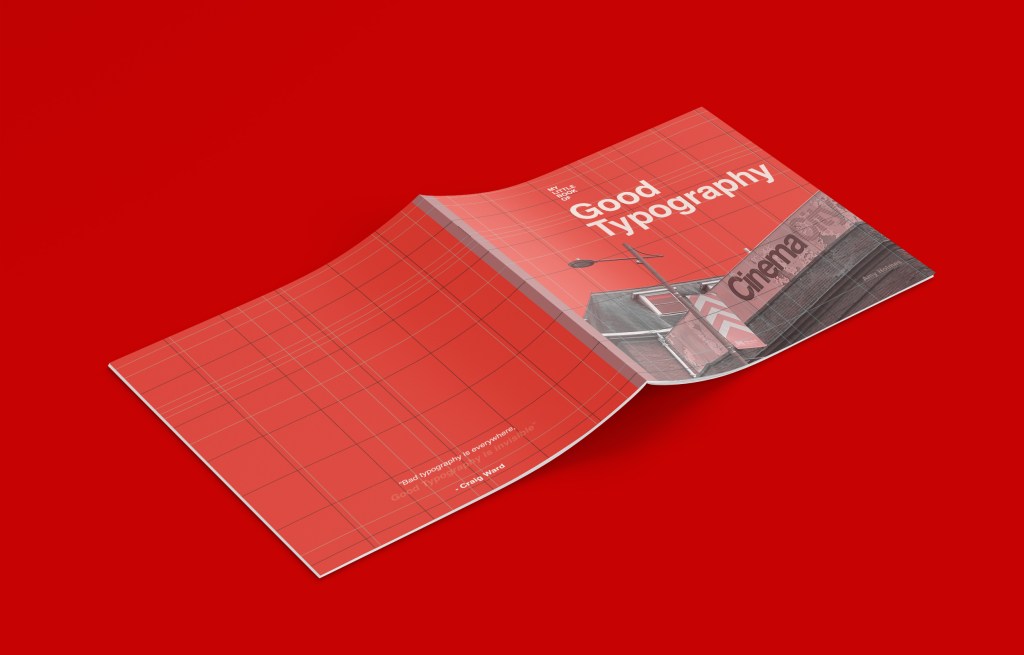
Late August I had a lot of trips out to various places; one of them places was Norwich (My wedding dress is there!) and as I was randomly walking around – I have only been there a handful of times now – I spotted some great typography on an old building that I loved the look of. Beautiful Swiss type on a classic old, industrial feeling building in a really urban, gritty, dirty environment. Good typography really is invisible! The typography that sits there completely overlooked on a daily! I had never even heard of the company CinemaCity before I took the photograph of it – I just assumed it was an old company that had gone under over time! However, I took the photograph and put it on my @Pink_Angeleno instagram page as a story about great typography that is completely overlooked.. I stored it on my phone and it was only weeks later that I decided that this would be a great photograph to use in my book! The typeface used was Helvetica and that is one (if not the one!) of the most loved typefaces of all time. I could do a piece on how great Helvetica is and how it is perfect because of its legibility.

I’ll be honest I didn’t even sketch any initial ideas for this! The ideas flowed from the photograph and as soon as I took it into digital to mess around with it, it got developed and changed until I reached the best design outcome! The rest of the Good typography book flowed from this one photograph – the feel, the colours, the vibe!…
I then needed my bad typography book to follow in the same footsteps and again, it’s only out of pure chance that I ended up taking a photograph on one of my other trips out in late August to Bristol that ended up being stored on my phone and then brought out for my book!
Late night in Bootlegger in Bristol with my Dads girlfriend after drinking my bodyweight in Sauvignon Blanc, cocktails and Jack Daniels doubles my drunken, incoherent self decided that sat next to me was a really bad sign! I was possibly babbling on about Graphic Design to my Dads girlfriend at that point.. who knows? All I know is that in that drunken moment I had to photograph this sign.. because? I just did!

Cosmops!!! All I could picture was an inexperienced young member of staff, (bad I know!) who had been told to create some chalkboards to advertise cocktails, they started off great but then realised they had run out of room and decided to just hyphenate it because that was the best thing that they could do in that situation other than having to wash it off and start again and take the time again to carefully arch each letter and make each one the same size…! It made me chuckle at the good effort and attempt but at the fact that it just wasn’t right!
I didn’t realise at the time I took this drunk photograph that it would be the idea and basis behind the bad book of typography for this assignment!
Looking back there are also examples of bad typography I only wished I had photographed! – What I learned from this assignment is that if I see anything I feel like I need to photograph I don’t need to think about it – I just should! I am creating a folder on my phone of random images that could later be used in future work! – Another example I wish I photographed was a sign that was placed on a tree opposite our house by one of our ridiculously interfering neighbours!.. She had placed some herbal plant in a big recycling bag at the base of a tree and wrote a sign saying – “please help yourself, put it in your house, its GOOD for you!” I made myself chuckle by reading it out in a hideous, monstrous voice because the way she had written it looked and read so aggressive and unhealthy!! I could have used that as a photograph to accompany why fonts matter!!
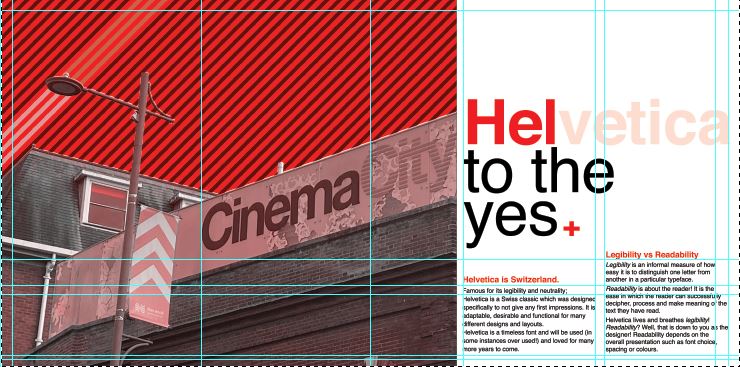
Good Typography page 1 &2! Hel to the yes with Helvetica and legibility.
Starting off with my photograph as what was then a really rough idea!- I imported it into Photoshop and had a mess around to see what I could do to change the colours, vibe etc.. I wanted to keep it very much in keeping with Swiss typography by keeping Red as the main dominant colour. The corner of the Red Royal Mail van set the tone for the red too!

I messed around with firstly putting a photo filter over the top of it, it added a mood to the sky but other than that the image just wasn’t striking or “modern” enough to use as a main image in a book!
The same week as I also started messing around with this, I also had my first Graphic Design interview for a job that I wouldn’t have really minded having a chance with! (I never actually heard back from them after the interview though!… *eyeroll) but during my process of prepping for it like an absolute mad woman (thanks again! like!… really appreciated!) I had to study their website to find out a little bit about them! -I noticed that their branding was also Red and I also noticed that they used a nice striped background on a lot of their images which gave me the idea for my photograph…

I did like this and decided to try and recreate it in the background for my CinemaCity!
I am still learning Photoshop, so googled how to create a diagonal striped pattern and then placed it behind my photograph. I then used the polygonal tool to cut out the sky on the photograph so that the striped background was visible but didn’t cover the main image.

I then changed the colour of the stripes near the lamppost which made it look like streaks of light were coming out of it which I thought looked quite cool! This layout felt more striking and modern which I was much more happier with!
I didn’t want the image to cover the whole layout, (I decided to make the size of my book 12.5 x12.5 which meant that this layout was 25 x 12.5) I wanted to have a spacious feel to the layout and make negative space very much a part of the design.
I then needed to concentrate further on the hierarchy and content for the layout:

I decided to move the photograph to the left but then I decided that I needed to put some of the knowledge I had learned in part 3 to some use and create a grid to work my layout around; I created a golden section/ spiral grid and worked the rest of the layout around it. The “eye” of the layout as I call it!- or the point of the spiral is where the main focal point is on the layout; it is eye level and it is where the eye travels to first. This is the spot where I have put the Swiss cross. I then found that my eye is led to the text below to read what the layout is about and then the photograph is the nice visual imagery that accompanies the whole layout!
I wanted something catchy for the heading of the piece!- a pun! something cheesy but which catches your attention and makes you want to read further! I did start off with just writing Helvetica but then decided that was far too boring! – How do I convey how good this typeface is? Hell yes! I kept Helvetica but then toned down the opacity on part of it so that the main heading reads “HEL to the yes” I liked it!
I wrote about how Helvetica is a very neutral typeface – it gives no impressions, it is what it is. I then thought about the saying that goes “he/she is Switzerland” meaning sat on the fence and not taking sides.. it also helped that Helvetica is Swiss so this made perfect sense! The sub heading to the piece was “Helvetica is Switzerland”. I then accompanied this with a piece of writing about legibility vs readability – 2 important topics within typography.

I wanted to keep it minimal and clean looking and wanted negative space to play a big part within the layout; I split the right hand side page into thirds and kept the content very much to 2/3, allowing the top of the spread to breathe and remain spacious!
I did then print a test page out just to see whether the content was readable! – the last thing I want is to lecture about readability and then the reader can’t actually read what I’ve created because the type is too small! I decided to change the layout slightly and make the text larger just to see if it was more easily read. It worked, but it didn’t work as well as the smaller text. I felt it lost a bit of its strong structure.
It then got me on to thinking about what a potential front cover might look like for this book and how I might create the other pages to mirror this layout… I was thinking about how I could potentially tie both books together – the only idea I had was like Yin and Yang! – Good, bad, light and dark, hot and cold, sweet and savoury! That was what these books were! one was Yin and the other was Yang! I started to explore possibilities around this idea and how the pages and layouts might work around it…
I sketched a few ideas… I had the idea of the books joining like the Yin Yang symbol; It would involve a section out of the books being cut out though, this would make the layouts smaller, busier and tighter. It would also make one of the books back to front which would be Ok because that could be the bad typography book!- one thing we don’t do in the Western world is read from back to front – consider it another rule broken!

With this in mind I started to create some ideas for a potential front cover..
Using the Golden spiral grid I created my first Yin Yang shape… the circle of the symbol is in the main focal point of the spiral. The book and the pages would be cut to the symbol.
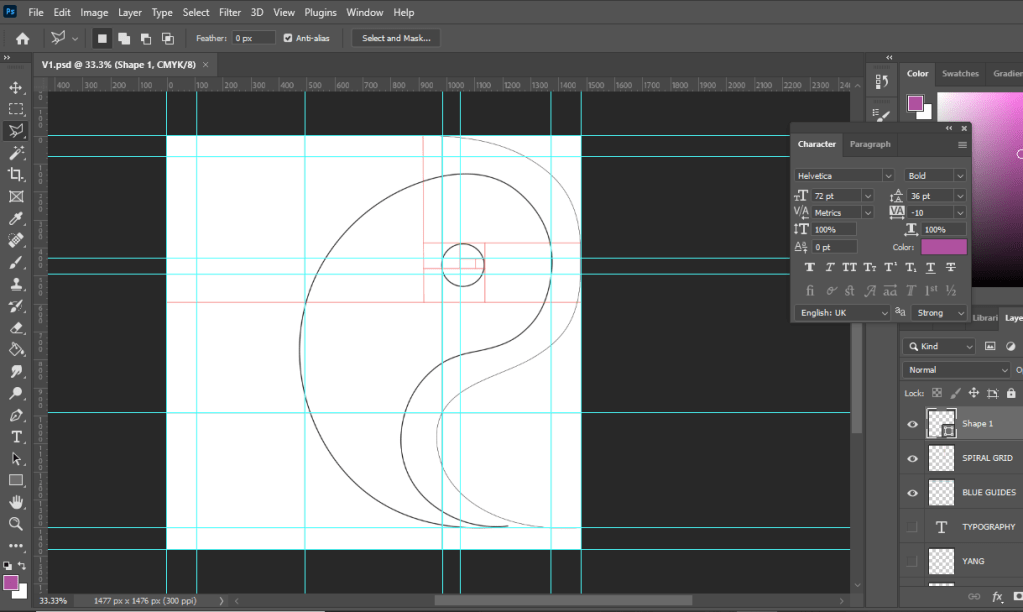
I then added further and started to try and build in the typography to the design…

I absolutely hated it but carried on! – it reminded me of a really dull, 1980s textbook I was probably made to read when I was a teenager!
It looked slightly better with larger text…

I then tried to bring in the Red…. It then looked like a Constructivist, aggressive book!

Brought in a bit of Green to try and contrast against the Red and also to soften it… Green is more of a natural colour.
I then decided to try and highlight the grid and the golden section more… I highlighted the rectangle which formed the golden spiral of my Yin symbol.

I then added the lower part of the symbol.. hated it, it looked like a foetus!

I hated the covers I had produced… but going back, I looked at how I would have to potentially change the layout to work with the cut out book and pages. I drew out the outline of the Yin symbol and worked out which part of the page and layout I would lose on both sides. It seemed a good idea… but I hated it. I felt that it would have to be cut by hand when I had printed the finals out and it would look shoddy and unprofessional. The phrase “keep it simple” resonated with me and I went back to the drawing board.

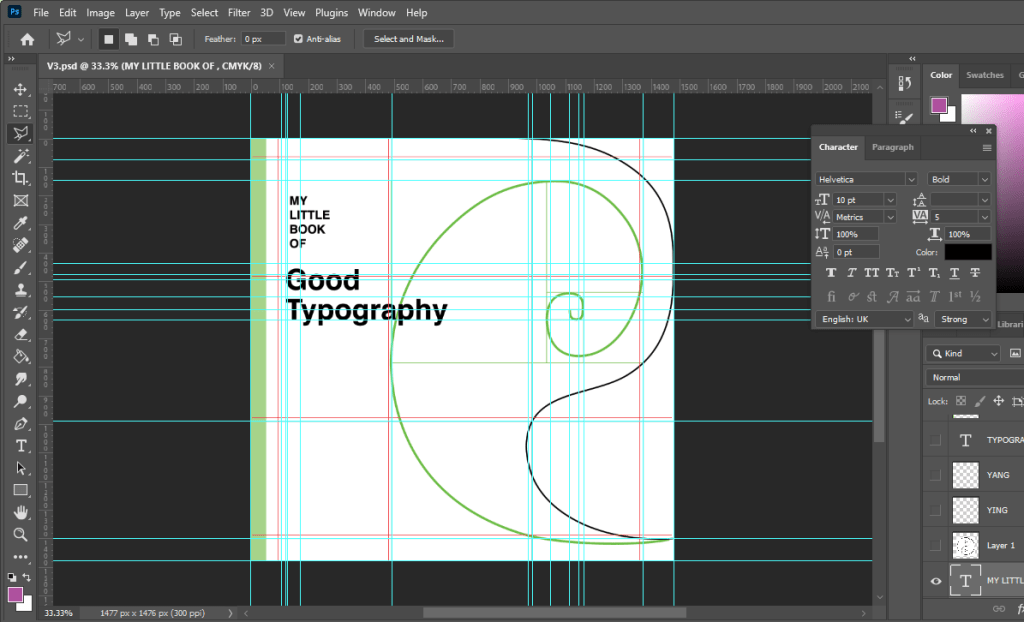
I then had the idea to tie in the Helvetica double page spread with the front cover. This could work… it would all lead nicely into each other then.
I then went back and tried a few designs for front covers using the Cinema City photograph:
I wanted to highlight “good” by making it larger but it just blended in with the Cinema City which is not what I wanted it to do! I wanted the title and the image to stand out each by themselves and not blend in together!

I felt that this worked better.. but I just didn’t love it. I didn’t want to go with it and regret my decision later when I decided that I hate it!

This was heading in the right direction! There was just something not quite right yet! – I felt like it was the stripes taking the attention away and smothering the rest of the design!

When I removed the stripes it worked so much better!!! It was clean, spacious, minimal.. the colours worked together and it just felt like Swiss typography! I loved it!

Loved it!!

Loved it a little bit more when I added in the grid element!!

I really wanted the stripe design to follow all the way throughout the book;, I had to take them off the front cover because it stifled the rest of the design but I decided that I would create inner inside covers with just the stripes to then lead into the rest of the book!

With the front cover, inside pages and the Helvetica layout smashed I was on to a good start! I then looked into what else I could do for the other pages…


Good Typography pages 3&4, Contrast!
For the next good typography pages I thought that I would do contrast – purely because like what I mentioned earlier there are several rules that come under the contrast umbrella.
- Contrast using contrasting colours
- Contrast using harmonious complimentary fonts within the same typeface family
- Contrast by using different font sizes and skipping weights, using different line weight thicknesses
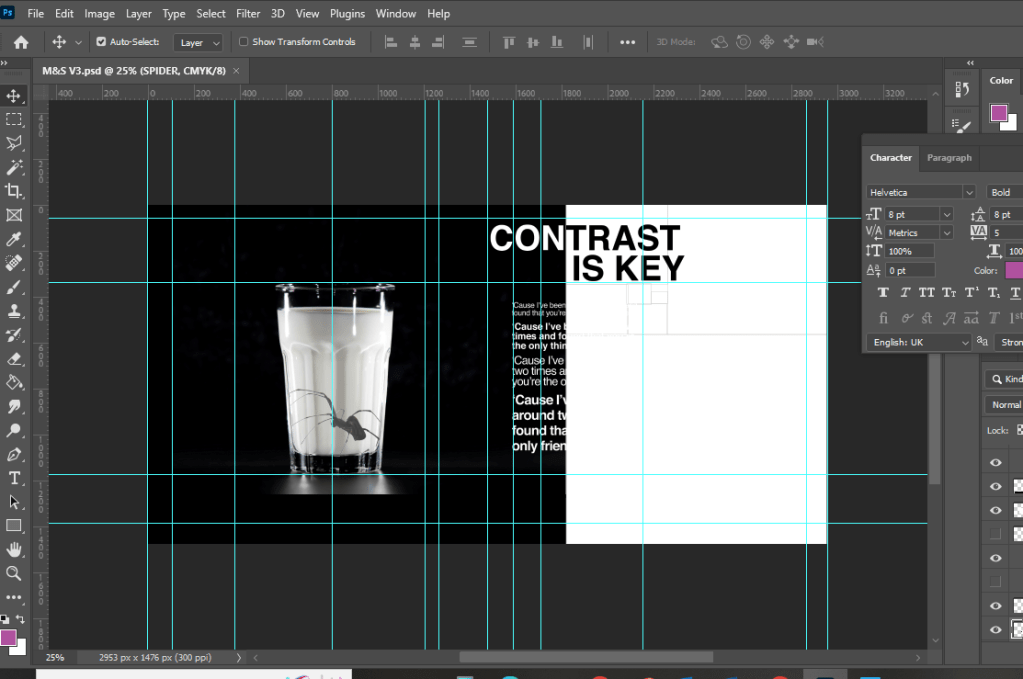
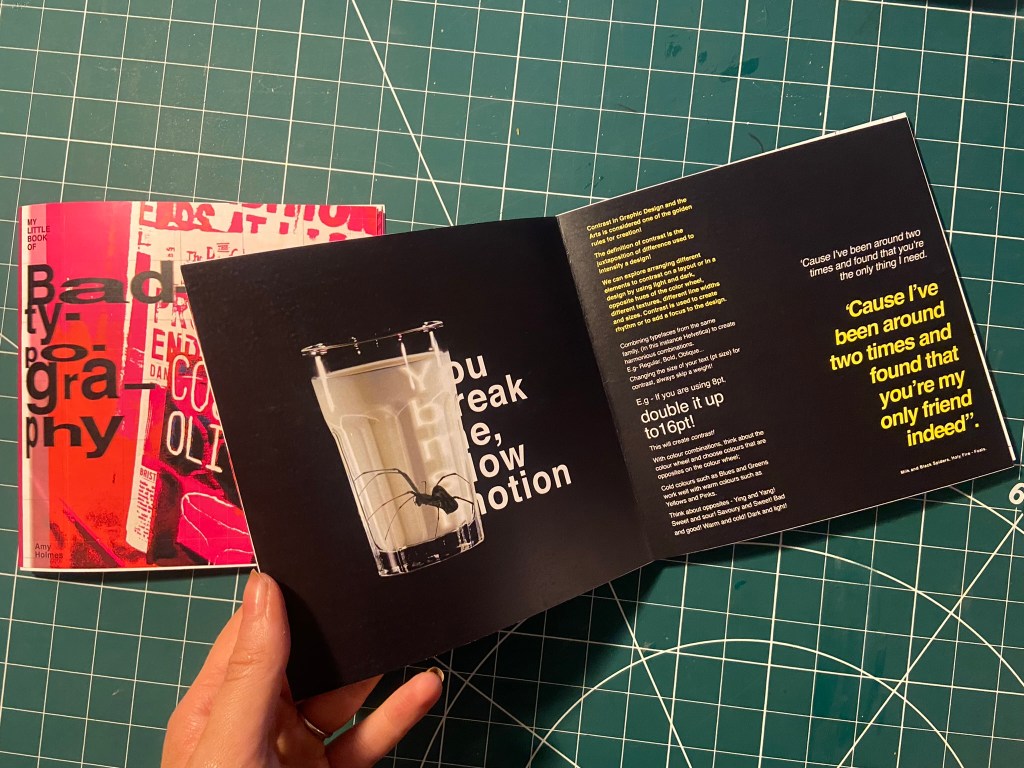
One of my favourite songs is Milk and Black Spiders by Foals and a few days before I started designing for this layout it was playing in my car on the way to Tesco and my fiancé was asking what the song was about, he was like “I guess its about contrast really isn’t it” this got me thinking about including the song and the metaphor of the black spider and the white milk as the subject for my contrast spread!
As a starting point I needed stock photography of a Spider and milk! I was going to take my own photograph of a glass of milk but felt that a free stock photo that I found on Pexels.com was perfect:

I then found one of a Spider which was also perfect! I could cut around the spider using the lasso:

I started off by creating a similar layout to the one I did for Helvetica. I wanted to keep the imagery very simple – I was undecided whether I wanted the Spider walking near the glass of milk or the spider (cruelly!) submerged in the glass. Submerged in the glass seemed a bit more dark and edgy for the feel of the piece! I also knew I wanted to use some of the verse of the song on my layout “You break me, slow motion” is a very haunting verse to use for an edgy looking layout!

Messing around with the dark/light, black/white on the layout…. it just didn’t seem to work though

I much preferred the milk and spider to be alone on the left hand page. It was clean, spacious and it felt like it gave an isolated, lonely, daunting, edgy feel to match the mood of the colours and the layout.
Using the saying “contrast is key” I tried to mess around with the layout again, there just was no contrast at all in this though – the text is all too big, it all blends in together and looks too harsh!

I tried to mute the “contrast is key” and have it bleeding off the page but it just wasn’t right…

I created contrast with the song lyrics by alternating between white and yellow text. I used yellow because it contrasts well against black and also because it is like a warning colour- this layout is about Spiders which brings warning to most people who have a fear of them!


It was important for me to achieve contrast in the written content; I had a large body of text and I had to try and keep it readable in such a small publication but I also needed it to contrast against the rest of the layout.

The end result of the Milk and Black spider was promising though!- I decided to distort some of the text behind the glass and reflect it to look larger as though its in liquid. I manipulated some of the spiders legs in Photoshop to make them bend to look as though it is pressed up inside the glass.

I think the final layout for this works well!


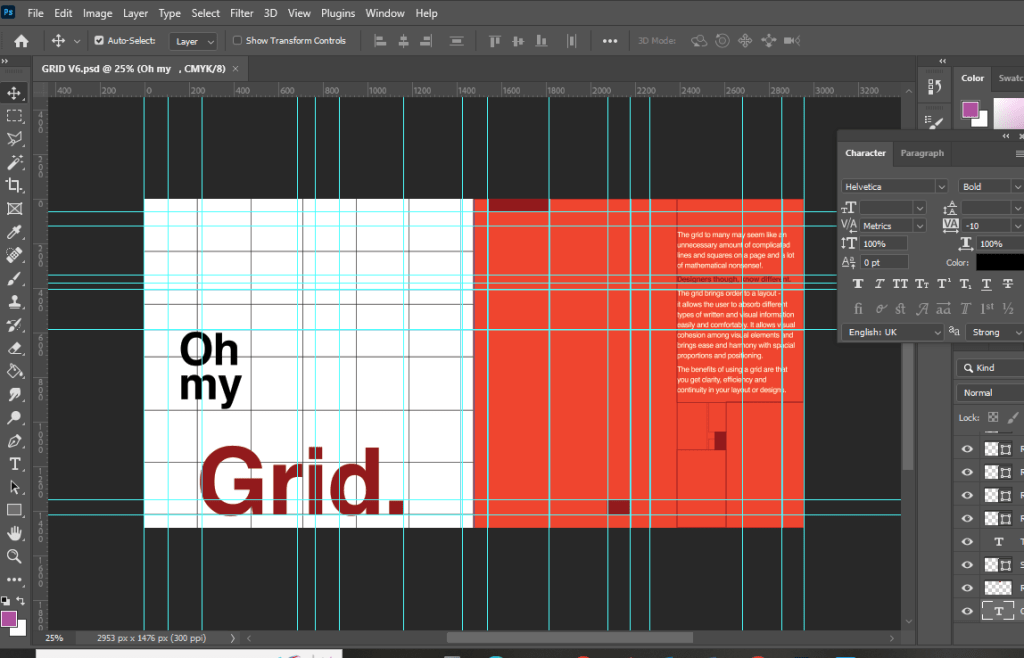
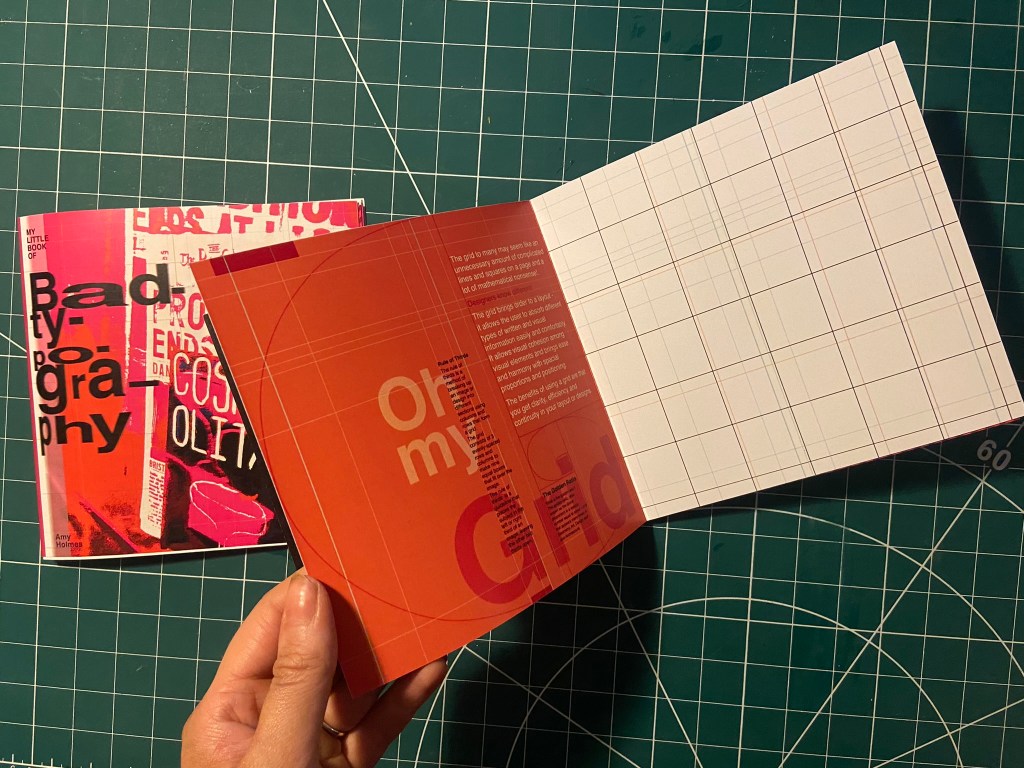
Good Typography pages 4&5, Oh my Grid!
I felt like the next best subject for my book was the grid system as the majority of this third unit has been based around the importance of it! I have also learned a lot in this unit from doing the grid exercises and research so I decided to try and include it and show off what I have learned the best I could in my layout!
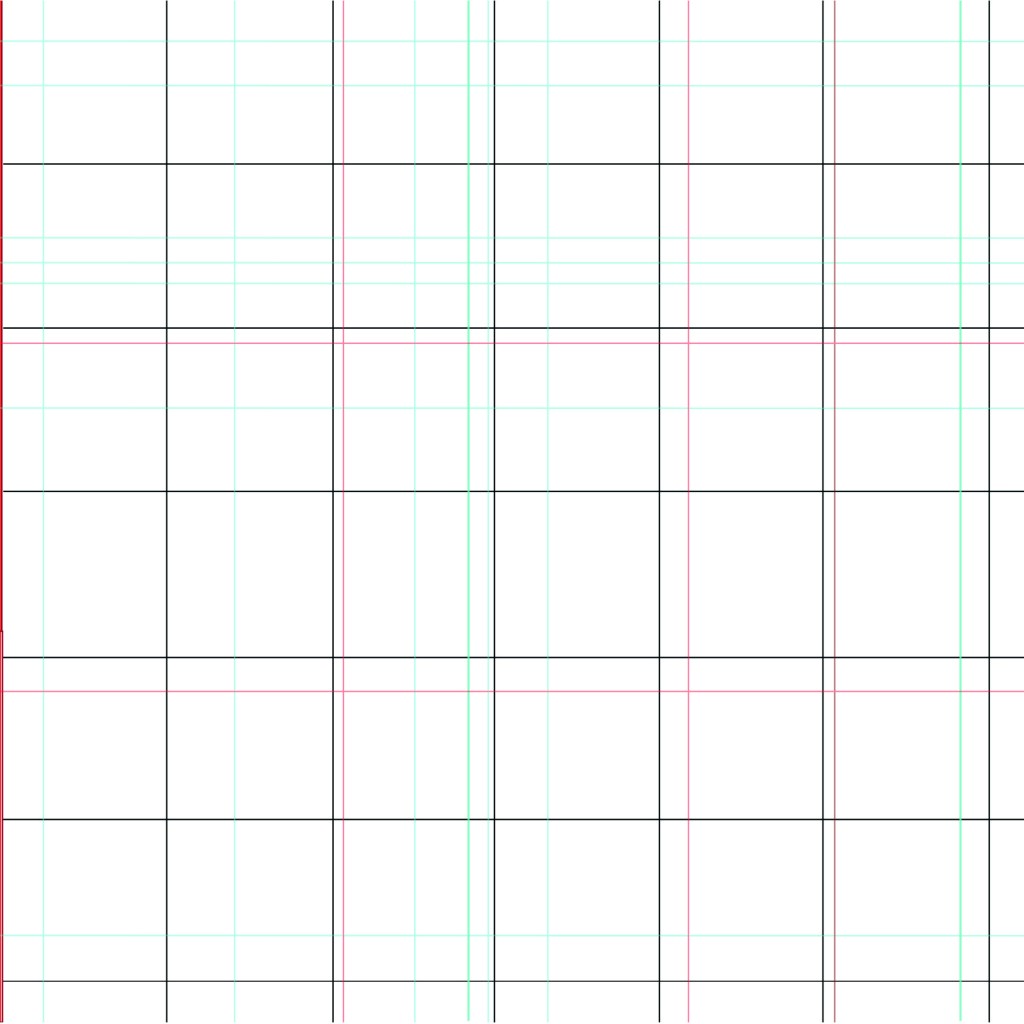
I started off by drawing out my grid!
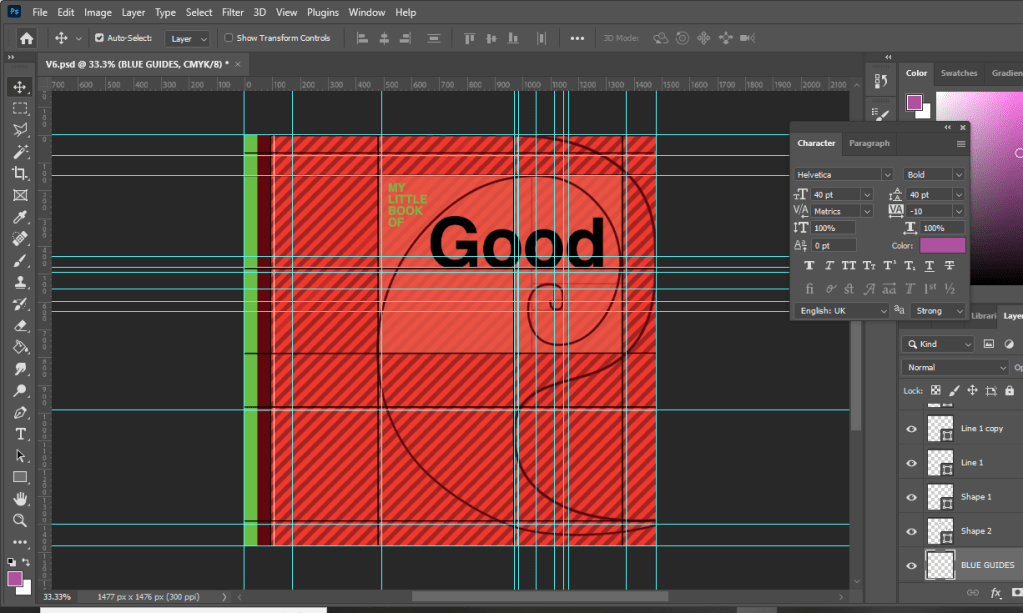
The pun “Oh my Grid” immediately came to me! It might have been because I wrote about how a lot of people might see the grid system as a lot of complicated and unnecessary lines all grouped together on a page and immediately panic and think OMG!! I did think to change it to “oh my good grid” to try and highlight that grids are indeed good! There was not enough contrast here though, the main heading needed to be bolder and stronger than this!..

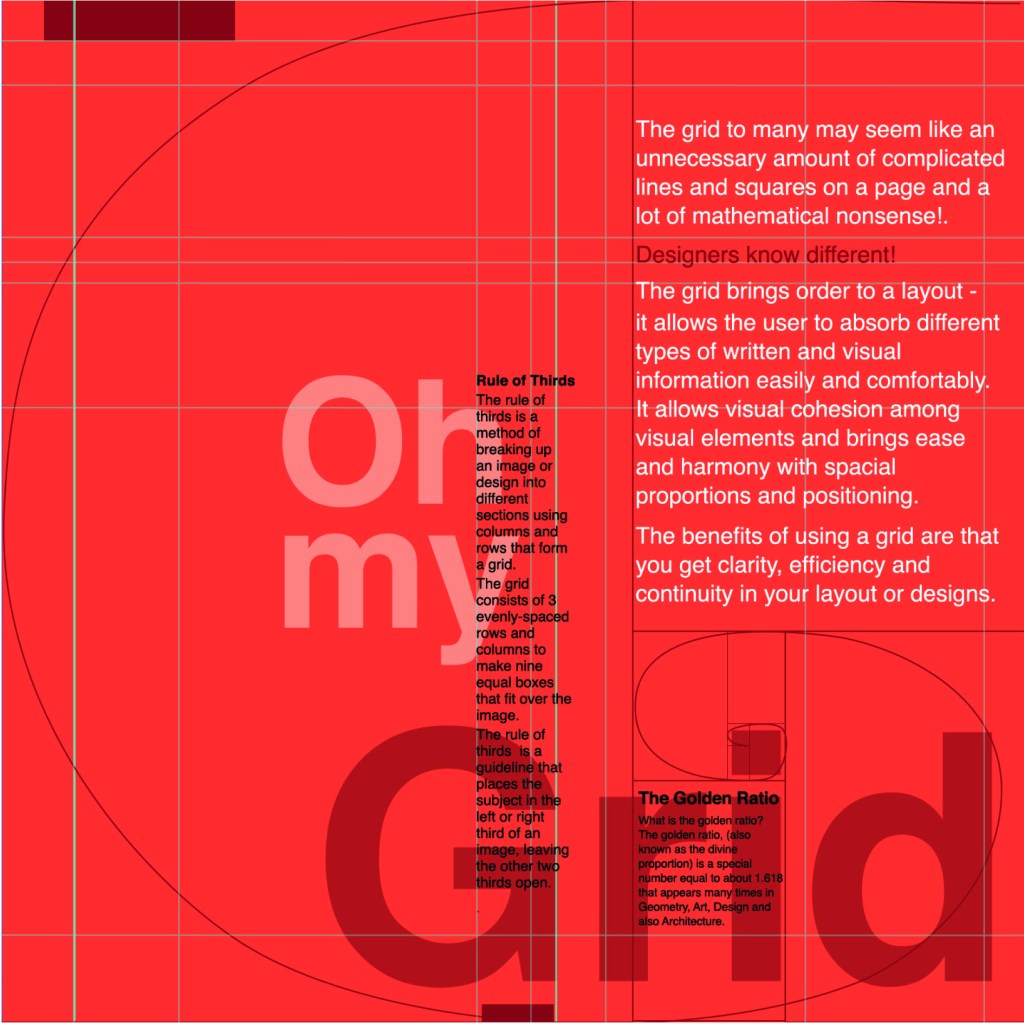
This was indeed heading in the right direction! The red married in with the main theme of the entire book but also worked in this layout considering that grid layout was popularized by iconic designers such as Josef Muller Brockmann who originated from the International Typographic Style (Swiss typography!).

I then included the Golden Section into my layout and the rule of thirds.


I decided that Oh my Grid worked better; it slips off the tongue and it is immediately obvious.

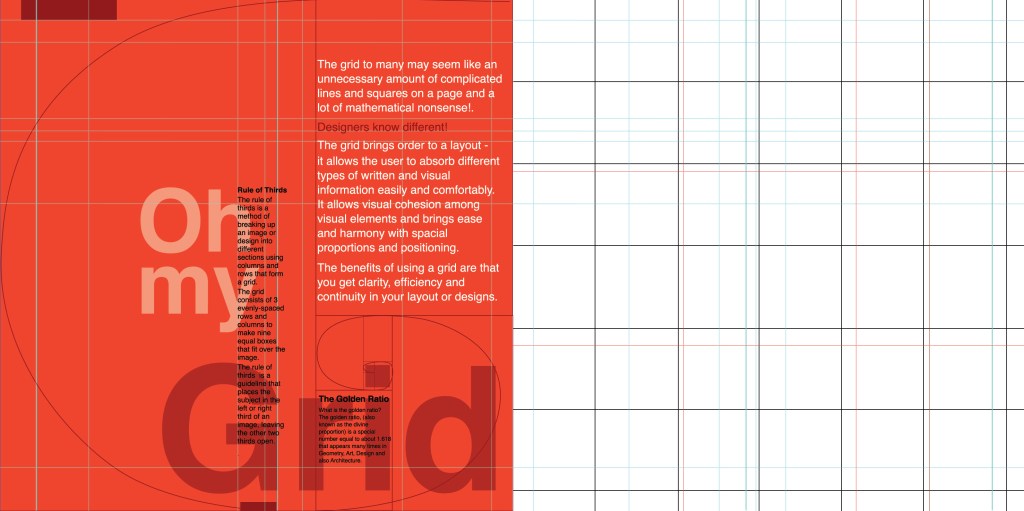
I then included the golden spiral into the layout which ties in with a little bit of text which tells you about it. This is a strong layout but I think it got better!

This layout happened completely accidentally! I accidentally moved the text so that it overlapped the other text and I actually really liked it! I switched the pages around and decided to keep the right hand page completely free apart from the grid outlines.
I also changed the colour of the small text to black because I felt that in Red it blended into the Red background more which made it more difficult to read!
I just needed a back cover!
I wanted the back cover to be pretty much the same as the front cover but minus the photograph.. I wanted it to be very simple, I didn’t want to put a massive blurb about what the book was about – the book and the images should do the talking for itself! That is where I found the quote from Craig Ward – Bad typography is everywhere, good typography is invisible”.

I also lowered the opacity on “Good typography is invisible” to make it look more invisible!
I was very pleased with all 3 layouts! I just now wanted to go back to the inside front pages and add a photo credit for the photograph on the front cover!


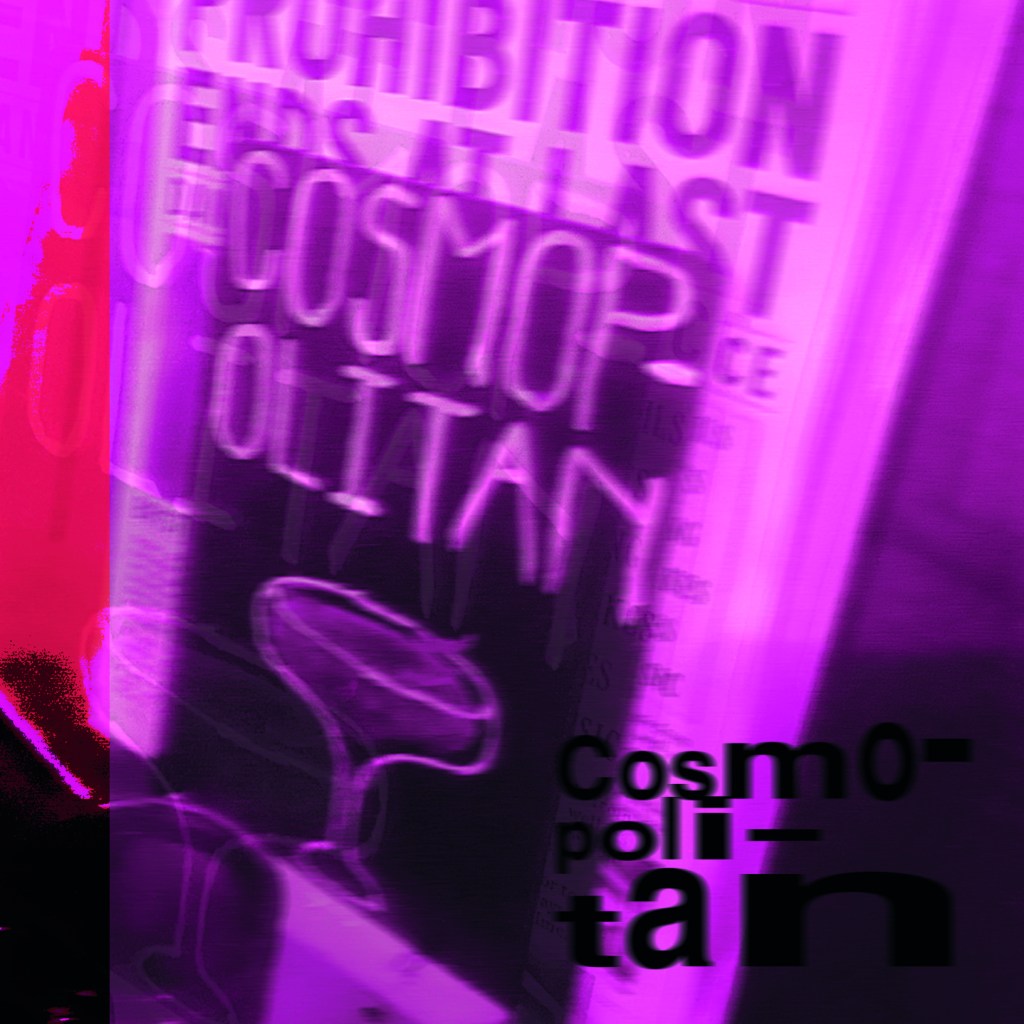
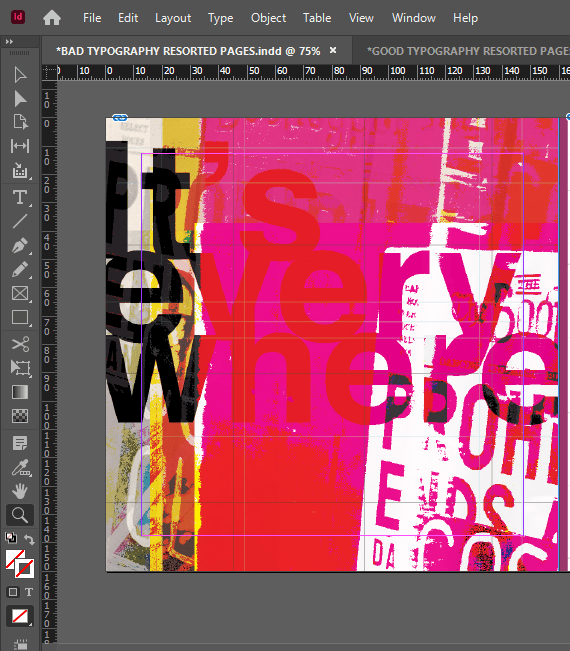
My little book of Bad typography, Cosmops and Hyphenation!
As I mentioned further up this post, I already had my main photograph (Cosmops!) that had set the tone and was inspiring the rest of my book; although I liked this photograph and thought it was a classic example of typography gone wrong, I was also worried that the hyphenation topic wouldn’t be a strong enough one to warrant being in this book – the more I looked into it though, hyphens are seen as a no no to a lot of designers so I decided to take the risk and go along with it and to see what I could come up with!
This layout also travelled the distance! It went from being too “safe” to me being brave and experimenting more with it!
Similar to what I did for Cinema City, I changed the colour of the photograph by adding a filter to it.. when I think of cocktails, I think of girls drinking them and I think of the colours pink or purple. I decided to go with Purple. I didn’t want to be too girly, I wanted a deep purple colour to be a bit more edgy and atmospheric.

I refer back to my comment about girls drinking cocktails; the most famous example I can think of is Sex and the City!-
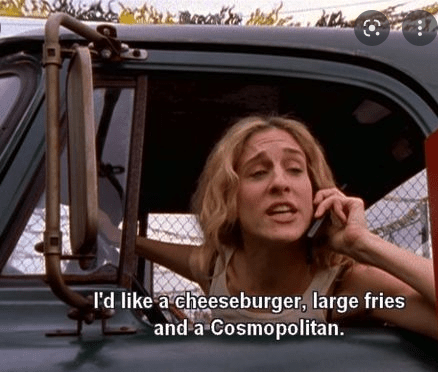
I decided to use this as the main quote on the page, further on though I turned against this idea; my fiancé said “I have no idea what that means…” it dawned on me that this book is for everyone not just Sex and the City fans!


As you can see above I played around with the layout a lot! Creating contrast, taking into account negative space and trying to create a harmonious hierarchy! It just seemed “too safe” for a book about bad typography though… I needed to get more experimental.
All I could hear though in my head was MOP MOP MOP! Mopping up those Cosmops on a night out! Drink some Cosmops! I got silly and used this as the main heading for the pages:

This was more experimental.. it was far more David Carson and Raygun.. What if though I could try and reflect the place I was in (drunk!) when I photographed this sign?.. it would also tie in with mopping up (soaking up!) the Cosmops! I used a blur filter to blur the text and the photo ever so slightly… just enough to disorientate the reader ever so slightly!…

Nailed it! It feels very Punk and Acid house! It feels like a drunk Saturday night out!
I also played it unsafe by hyphenating all of the text to make it really uncomfortable and hard to read!

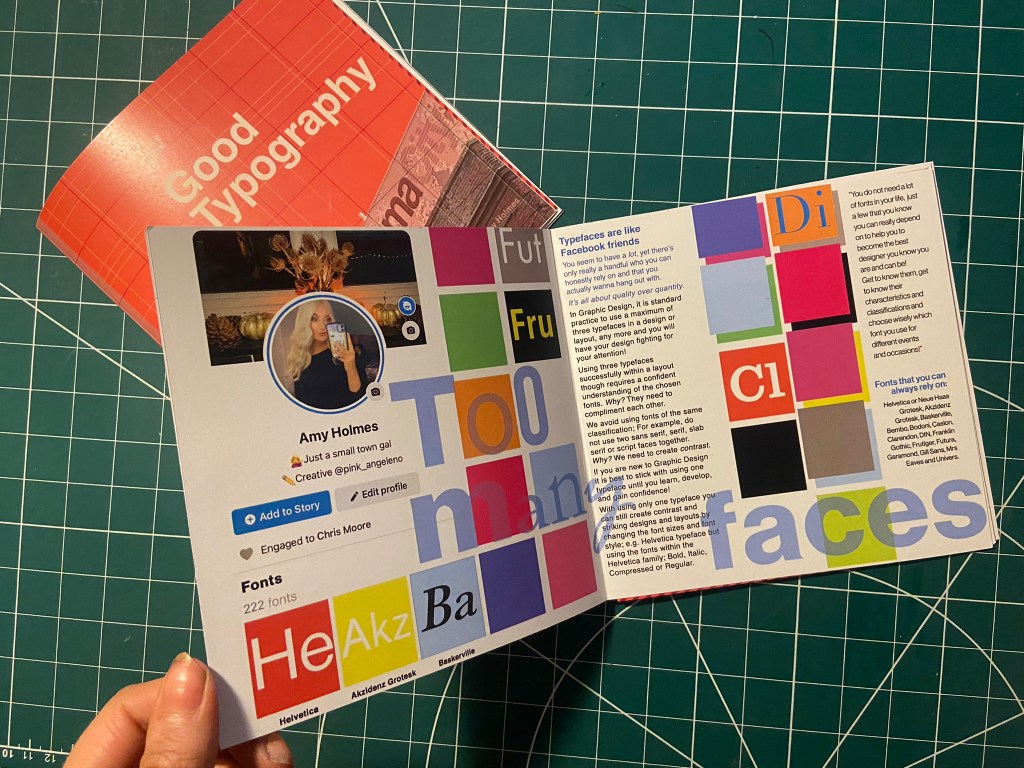
My little book of Bad typography, Too many (type) faces!
I decided that the next topic to appear in my book should be “too many typefaces”, Two pages about how using too many fonts can be bad for a design. I had the idea in my head of typefaces being like people- friends on Facebook more specifically. People boast about how many friends they have on Facebook when actually they are more acquaintances and people that you keep on there just to nosy at! A lot of people have complete randoms on their Facebook just to keep their friends number up! I am talking quality over quantity; rather having a handful of friends than loads that are crappy! It is exactly the same with typefaces, I have loads on my computer but I always go back to the ones I love and use frequently!
This is also a layout that travelled far! Again, I felt it was “too safe” and too “magazine” for my liking. It felt like a glossy spread in “Pick me up” magazine than it did belonging in a chic little book about bad typography!..
Using my Facebook for inspiration, I only have 222 friends… (probably 220 acquaintances!!) I screenshotted my Facebook app and imported it into Photoshop to manipulate and include in my design layout!
It was easy to match the typeface to Facebooks app – Helvetica! Duh! 😉
I just cut out friends and replaced with fonts.

I wanted to keep the feel of the layout like something that would be on Facebook – I used the same blue as the Facebook logo. I used the “what’s on your mind?” section of Facebook to use as a speech bubble type thing to talk about how using a maximum of only 3 typefaces at one time is crucial in Design.

“Too many fake mates” didn’t really highlight what the piece was about… It gives out mixed messages and meanings.


I took out the photos of my “mates” and replaced them with a coloured square featuring the beginning of the name of a typeface to represent my font friends.


The spread below reminded me of a page out of Pick me up magazine… It just wasn’t right for a book.

It then went back to this… which I thought I was going to go with…

It then went to this which I was certain I would go with!… (plus my profile photo changed by this point!)

But! It just wasn’t “bad” enough… it all felt too regimented, clean and like it belonged in the book about good typography!
I then went along with this one!- It was busy, bright and too much going on for too many typefaces!

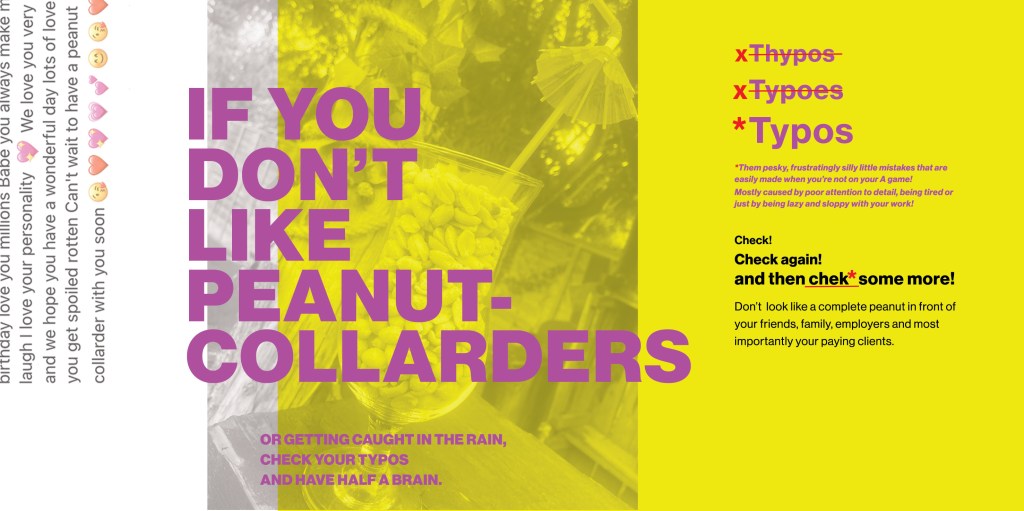
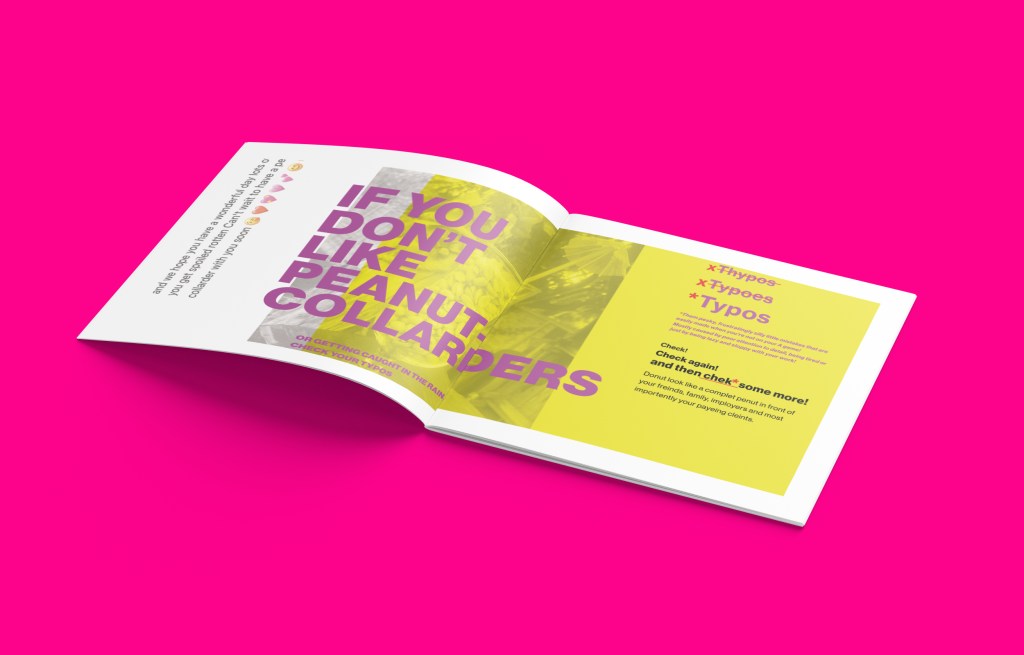
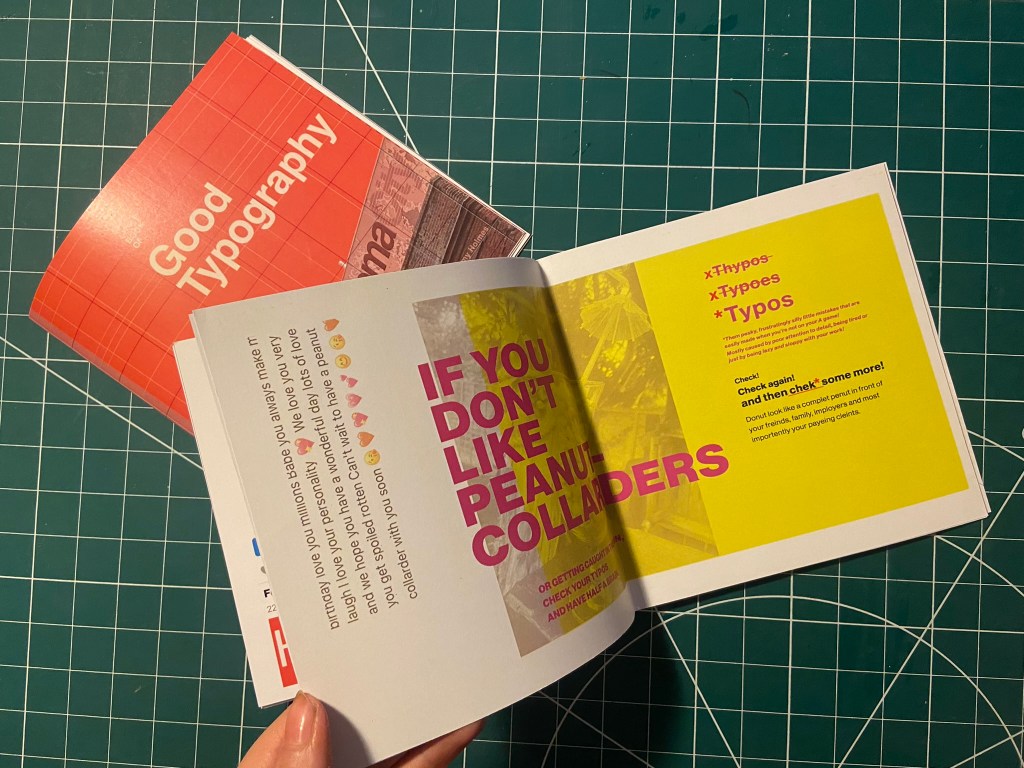
My Little Book of Bad Typography, Peanut Collarders! – Typos!
This next part of My little book of bad typography was inspired by a Facebook post that one of my distant friends wrote to one of her best friends.. I read it and (cruelly!) might have laughed a bit and instantly screenshotted it to use as material for Typos!! – the topic of my next pages!
Ok!.. so the infamous message was this!

Possibly a little bit mean…. ;s but c’mon!… it was too perfect to not use! Do you like Peanut Collarders?… ;p
Firstly I needed to know what a Peanut Collarder might look like! – cue our outdoor bar, a pink umbrella straw, a large bag of peanuts and a Pina colada glass!..


Like I have for all the other layouts, I imported a photo of my Peanut Collarder into Photoshop and placed a yellow filter over the top.
I then also altered and imported in the Facebook message (obviously protecting the identity of who wrote it and who it was intended for!) Obviously I had to use the Pina Colada song as the main heading for the layout! – It started off with “Do you like Peanut Collarders?” but then evolved to “If you don’t”.. then don’t create typos!!
Once again though the layout seemed too “safe”, I really liked the look and feel of the layout but it needed to be made more “bad”.

I then spelt “Typos” three times making sure that the first 2 were definite typos!

This then evolved into a host of typos in the main body of text – it related more to the nature of the book and it reflected typos perfectly!


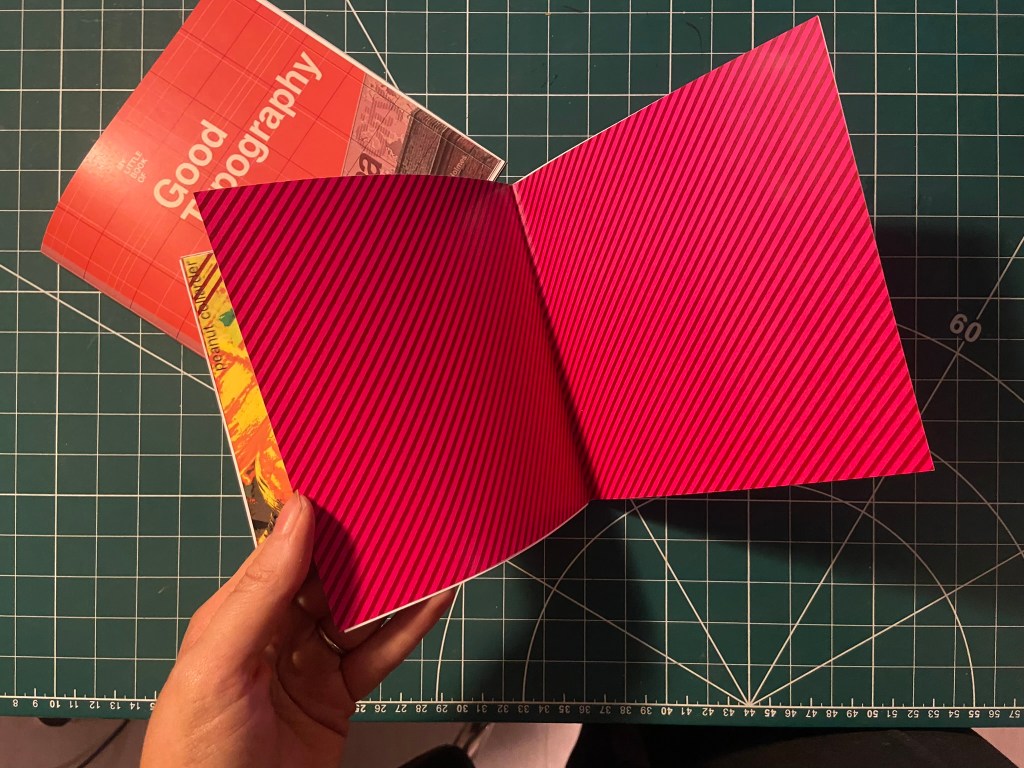
I then had a think about the inside pages; on my Good typography book I had the striped red inside pages… I wanted similar for this book too but in keeping with the Pink, Punk colour!

I also included another photo credit for the photograph taken in Bootlegger!

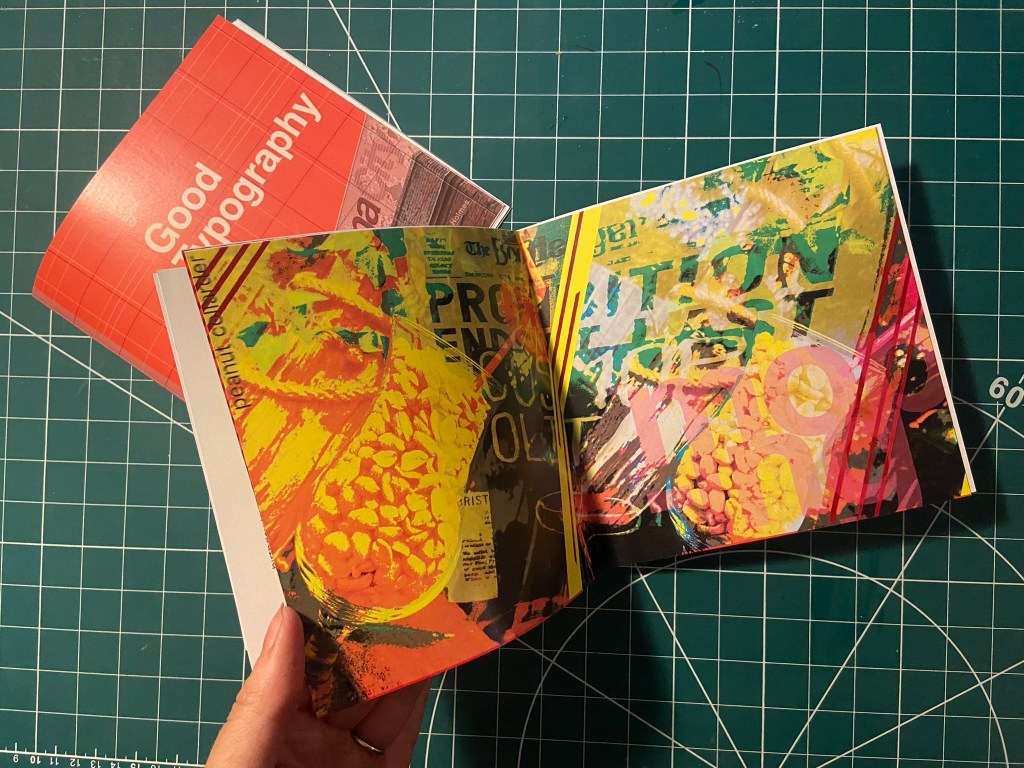
I then had to work on the front cover for the bad typography book! I had big shoes to fill from the first cover! I did like the David Carson inspired pages I did for Cosmop so I wanted to follow in the same footsteps!
I had loosened up a lot from starting this assignment so for this cover I just went for it!


It only took 2 attempts and I knew I had cracked it! The response I got on my Instagram when I uploaded them was proof enough! –

I have noticed that as the time goes on and I gain more and more confidence I am able to stop second guessing myself and put out a design after only a shirt while working on it and know that it was the right decision!
They did look good on my Insta feed though I do have to say!… They got a lot of love from my fellow OCA peers too!


It was then time for the back cover.. I pretty much wanted the front cover to roll over to the back because I loved it so much!

Bad typography is everywhere so that is all I literally wrote on the back!… it did change ever so slightly though because when I imported the jpeg into InDesign I actually liked how it looked when I zoomed in on a certain part of it!
Perfect!
I also wanted to do a similar thing for some inside back pages for this book, in the style of David Carson and collages and like what I have done for the front cover and the Cosmop layout!


It looks like absolute mayhem! Peanut Collarders, Cosmops… wild night out!


Making the final books
As always when creating a final book I always set up a document in InDesign and then import any images I create in Photoshop in to then add text etc… this time I worked differently, I created everything in Photoshop and exported the jpegs and then imported them all in!


My methods of printing the books are not ideal; I did not take this one to professional print I just did as I did with my zine and printed it out at my workplace using their laser colour printer. I really struggled to correctly paginate my pages when I printed my zine to my work laser printer last time because the printer flips the pages weirdly! I found that I had to lay pages put upside down and at different sizes to print correctly last time! – it was a nightmare! I tried the same this time, I paginated all the pages but because there was only a certain number of pages there was a double page spread on each book that printed out blank! I did not want blank pages in my books so instead I went back and printed each spread off individually and bound my book together in a different way!

I printed my books out using the same paper stock as I used for Robinson Crusoe; a lightweight glossy card stock – (it is somewhere between paper and a really thin card!)


I then used photo mount and glued the pages back to back, the way I bound my book actually made this the perfect paper stock to use because by the time I had finished I had really sturdy glossy little books! The spine was quite prominent too and sturdy!
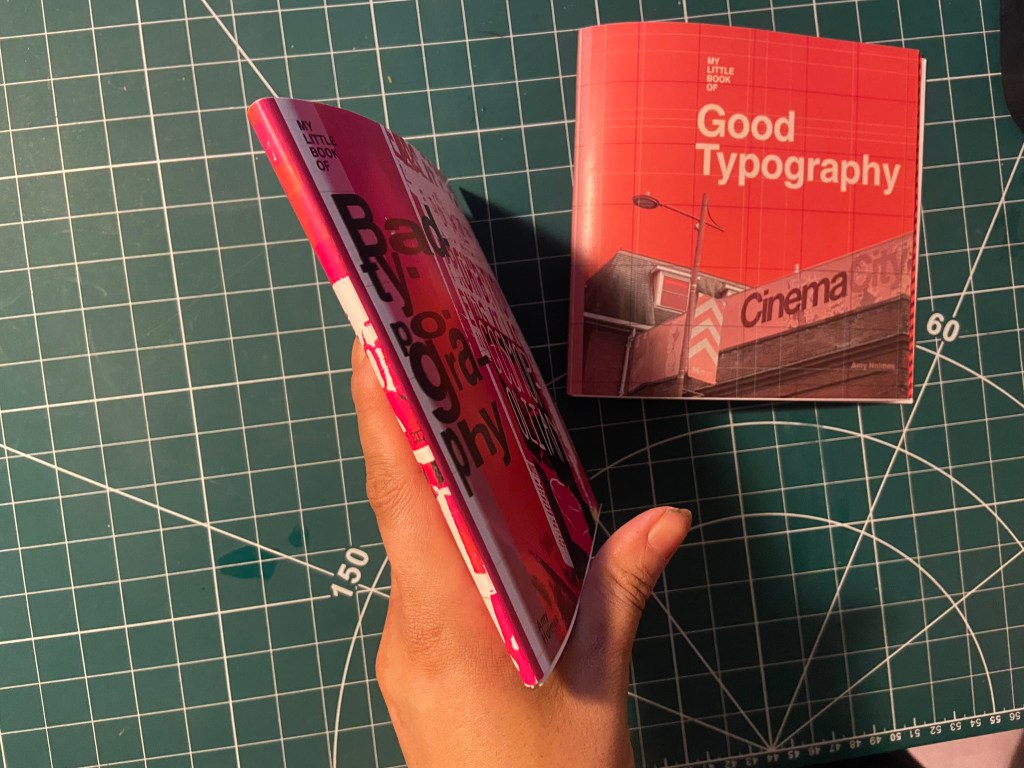


Conclusion
The one thing I will note that I have done differently this time is that I have very little initial sketches!- Usually I have handfuls of little doodles which help inspire my designs; this time however I was working from my instinct and digital development! The 2 photographs inspired my thought process and then digitally from there everything just flowed! My confidence has increased since the start of this assignment, I am really pleased with how my books have turned out. The response on Instagram and from friends and family has been positive too! The verdict has mostly been that they look very striking and professional! In my next assignments I wouldn’t make the same exception and have such limited drawings but I took a risk with this assignment to work digitally and it paid off! I am so much more confident with grid systems too which is something a few years back I never thought I would say! I used to hate the grid and be one of the people I wrote about!- just a page full of unnecessary, complicated lines! I really enjoyed this assignment and I think my skills and layout design has come on leaps and bounds from “If the face fits” in Core Concepts. Next time though I shall probably look into having them professionally printed; it will also give me the experience in dealing with industrial printers and outside professionals!
