The Brief

First Thoughts
I remember having an exercise very similar to this in Core Concepts and I have to say that even though I very much see the relevance and significance, I hated it all the same!- the mundane task of dissecting a layout and then recreating it in various ways…
But! Here I go…
Choosing a layout
I started off by choosing a book to pick a layout from to dissect – the book I chose is very relevant to this unit and to the upcoming assignment; “Stop stealing sheep and find out how type works“. My copy is very worn and tatty with all the pages loose and barely hanging in there but I chose a double page spread that I could analyze and copy for this exercise!
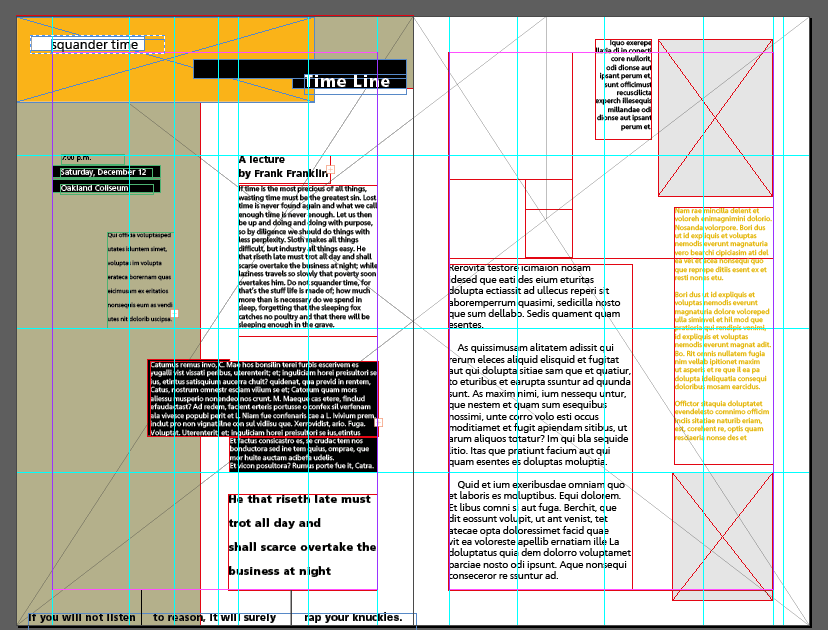
The double page spread I chose was completely at random by simply opening the book up and seeing which pages I ended up with; it turned out that I did rather appreciate the sentiment of the article which is why I have chosen to replicate the main verse of it instead of using all Lorem Ipsum:

An article about appreciating the value of time!
Despite what the authors state in the top right paragraph about this spread, (they suggest that this DPS is quite a minimalist layout) I feel that there is quite a lot crammed onto it!
The layout and the colours remind me of something that I might find in a Bauhaus book, there is everything here to make a Swiss classic! – Sans-Serif font, a layout to a structured grid, lack of photography or images, geometric shapes, 3 contrasting colours…
Despite my personal opinion that I would have liked to have seen less content on this spread, everything on this layout does flow nicely. It jumps comfortably up and down and from left to right… there are no curves or need for the eye to jump massive spaces from one element to another. It is all very “blocky” and quite regimental in its approach. It is clean and for the amount of text that is being presented on this spread, legibility and readability is the most important factor.
The rule of 3 is being used; there are 3 blocks of black to tie the elements together and the same with the Yellow colour – the yellow text clearly is related to the diagram in yellow.
I think that this grid is quite simple.. columns of 6 potentially:

Just because of the way the layout is very “blocky” and flows that way I think that it is following a simple grid like this one and that the elements are being lined up to its relevant column.
Recreating the layout…
I then went about the painful process of drawing out the layout and measuring everything on it:

At the end of this long drawn out process it looked like I have drawn a floorplan of a house!
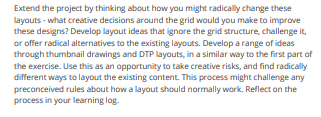
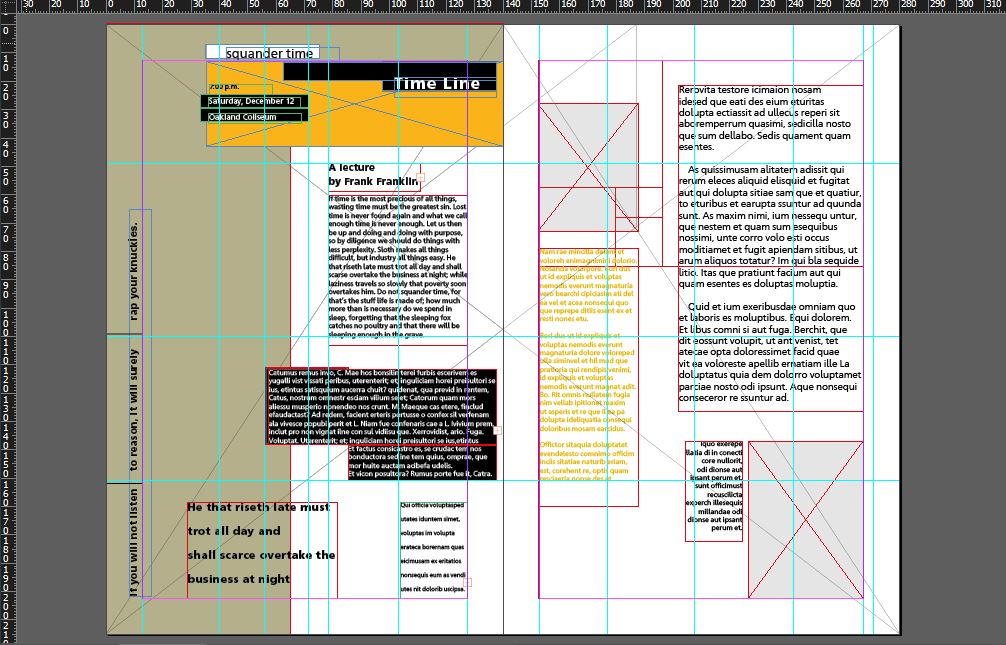
Next came the slightly less painful process of recreating this in InDesign:
Below shows the elements sat in their measured positions.

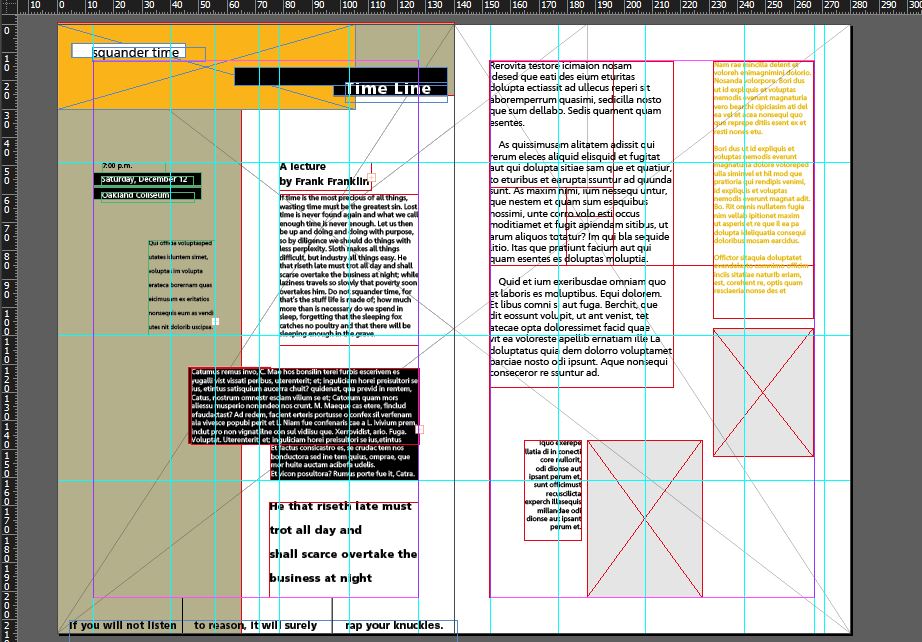
Below shows the layout without the guides and grid present:
Using a 10% shaded area for the decoration on the page, I also used Lorem Ipsum for the main body text apart from the lecture by Frank Franklin which I enjoyed and wanted to show.
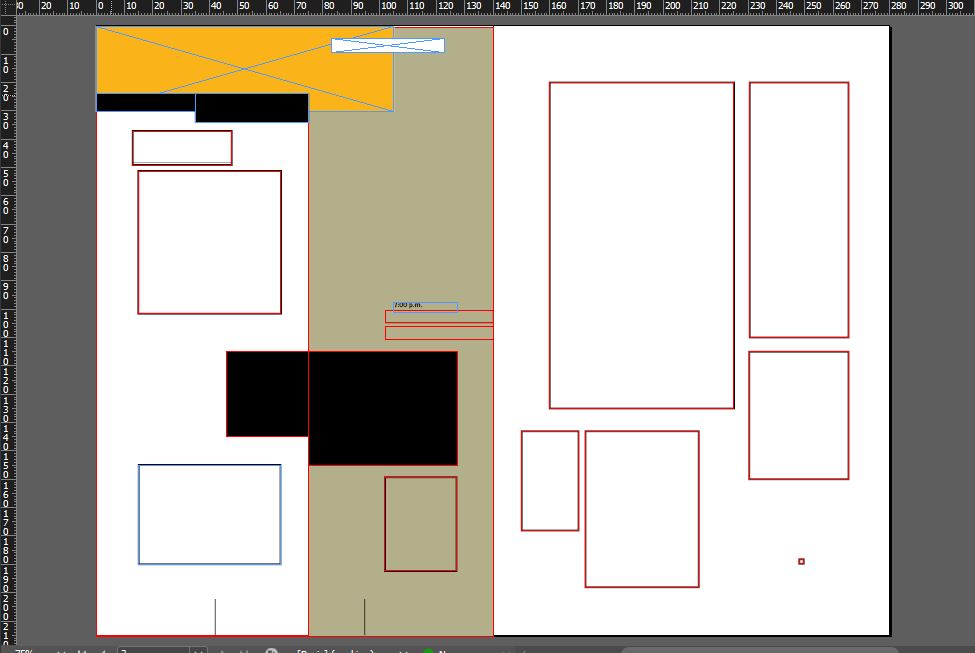
Before I even read this spread I was trying to guess what font had been used and the point sizes of the text. I knew that the typeface used is a Sans-Serif; my first thought was Franklin Gothic to tie in nicely with the authors name! I did try it out and it did work but it wasn’t quite right.. I then did think about Frutiger as the letters were more bold and rounded and then as I read the article I realised that they actually mentioned they used Frutiger on this spread for its “more humanistic touch” which improves legibility by keeping the shape of the letters more open and more distinct from each other.
On the right hand side looking at the point sizes of the text I figured that the main body of text was a bigger size and that the two accompanying pieces of text would be about 2 point sizes smaller. I went for 10 on the main body text and then 8 for the two other pieces of text. I figured 10 is possibly more on the smaller size for print and would be the least I could go for this large piece of text to keep the legibility and readability.
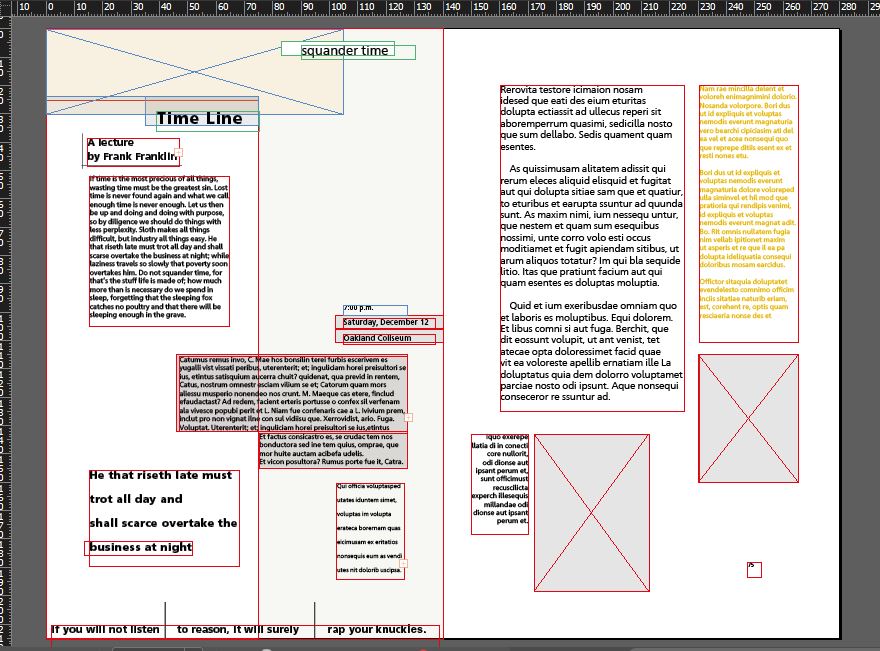
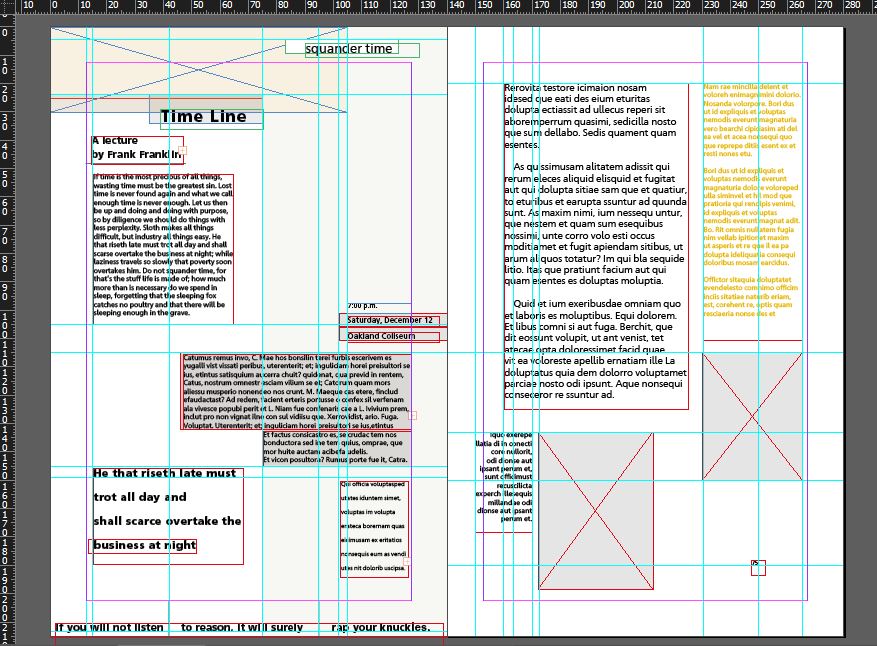
Again, above is the layout without the grid and guides present.
Below is what my final recreated layout looks like! (I did make the coloured boxes full opacity just to show the likeness to the original!)

Extending the Exercise: new layouts
I then looked at how I could further change the original layout some more by completely changing and moving the elements around.
I decided to create my own grid, using the same page measurements as the original (A5) but by bringing in my 6 column grid and creating a Golden Ratio and spiral:
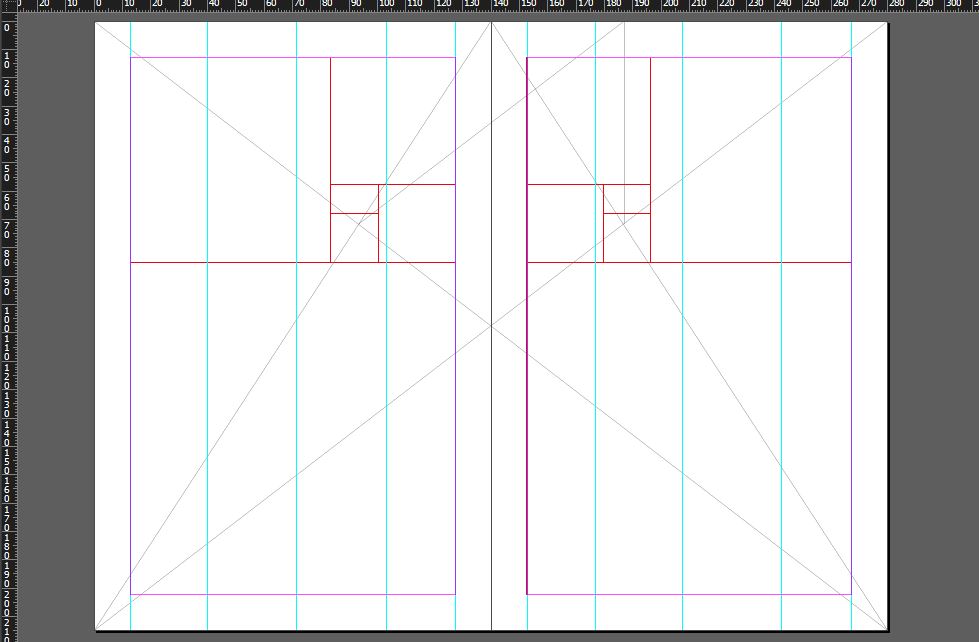
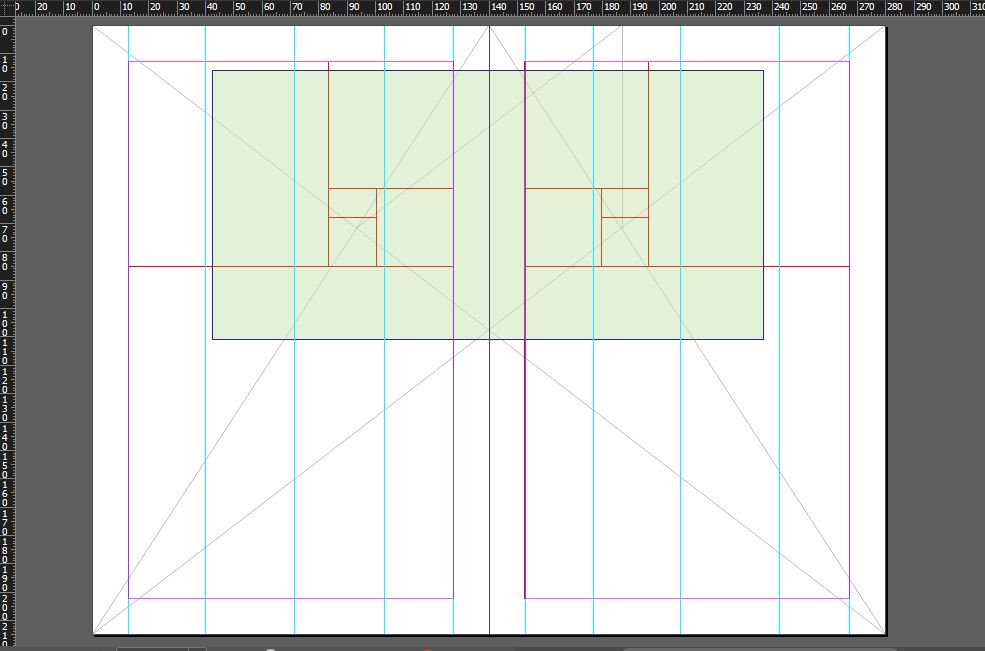
From the research I have done previously on The Golden Ratio and Golden Spiral, I learned that the main focal point of a layout is at eye level and at the smallest point of the spiral (where I have highlighted using the grey rectangle below!). I knew that this is where I needed to place the most important information or elements from the layout.
Alternative layout no.1

I like negative space and felt that the original layout didn’t really seem to have a lot of it, in this version I have created space around the outside to allow the layout to breathe. I have organised the elements of the layout by importance by putting the information that I feel needs to be read first around the “eye” of the spiral (eye level). My eye is first drawn to the title and then straight to the accompanying article with my eye then travelling on to absorb the rest of the (less relevant) information. I have aligned the text boxes to the columns of the grid gently allowing the eye to comfortably navigate and jump between the text. On the right hand side page I have allowed for space in the bottom corner and aligned the main body of text next to the main body of text on the previous page (again at eye level).
The only thing that would need to be well thought out is how far near the spine the text is on each of the pages because if this double page layout was going into a 400 page thick book, the text might get lost in the gutter of the spine when the pages cannot be opened fully.
Alternative Layout no.2
Alternative Layout No.3
Alternative Layout No.4
The page that I have changed on this layout is the right hand page. I was trying to take all the elements away from the focal point (eye level) just to see if this made a difference to where the eye travelled and what information was absorbed first; it does, but I am surprised that I don’t think it distracts in a bad way. My eye is now drawn to the area of negative space in the top corner and negative space is as much a part of the design as anything else and I think it also helps balance the double page spread out; on the left hand page the bottom corner is the negative space – there is balance in the hierarchy.
The Conclusion
So, although this exercise has been painful it has also been worth while completing as I have learned a lot about hierarchy and where to position elements on a layout. Again, the importance of a grid has been emphasized to me once more. I am learning to see the grid as more of my friend than a bunch of confusing, mathematical lines and workings outs on a page! Although I still think I need to research, study and learn more about grids so that I can comfortably use them without the fear of doing it wrong and feeling nervous and apprehensive about the process!
