- The brief
- First thoughts
- Research
- Initial Ideas
- First designs
- Final design
- Critique and Feedback
The Brief
First Thoughts
I will admit that when I first read this brief I felt confused and frightened by it and I had no idea of what I would do! – There was just so much being asked and explained and so much information to absorb!
I think that including metaphors and similes into the equation made me initially freeze and panic and make the brief seem far more sophisticated and complex than it actually is. My brain was trying to find complicated answers when actually it was quite a simple response.
My first thoughts were to familiarise myself with metaphors and similes as my GCSE English days were a very long time ago!..
Metaphors – To compare something as something else (2 unrelated subjects) Refers to one subject by mentioning another or it might identify hidden similarities between the 2 things.
Similes – To liken or to say something is similar to something else, particularity using the words “like” “as” or “than”. “As brave as a lion”.
Moving on from this I decided to research some metaphors and similes around the 4 words I have been given to choose from in the brief. I chose Love and Danger to look at some examples and then to decide which one I would choose;
Love –
- “Falling in love”
- “blanket of love”
- “Love is a battlefield”
- “Love is a garden”
Danger –
- “Skating on thin ice”
- “playing with fire”
- “On dangerous ground”
- “sail close to the wind”
Research
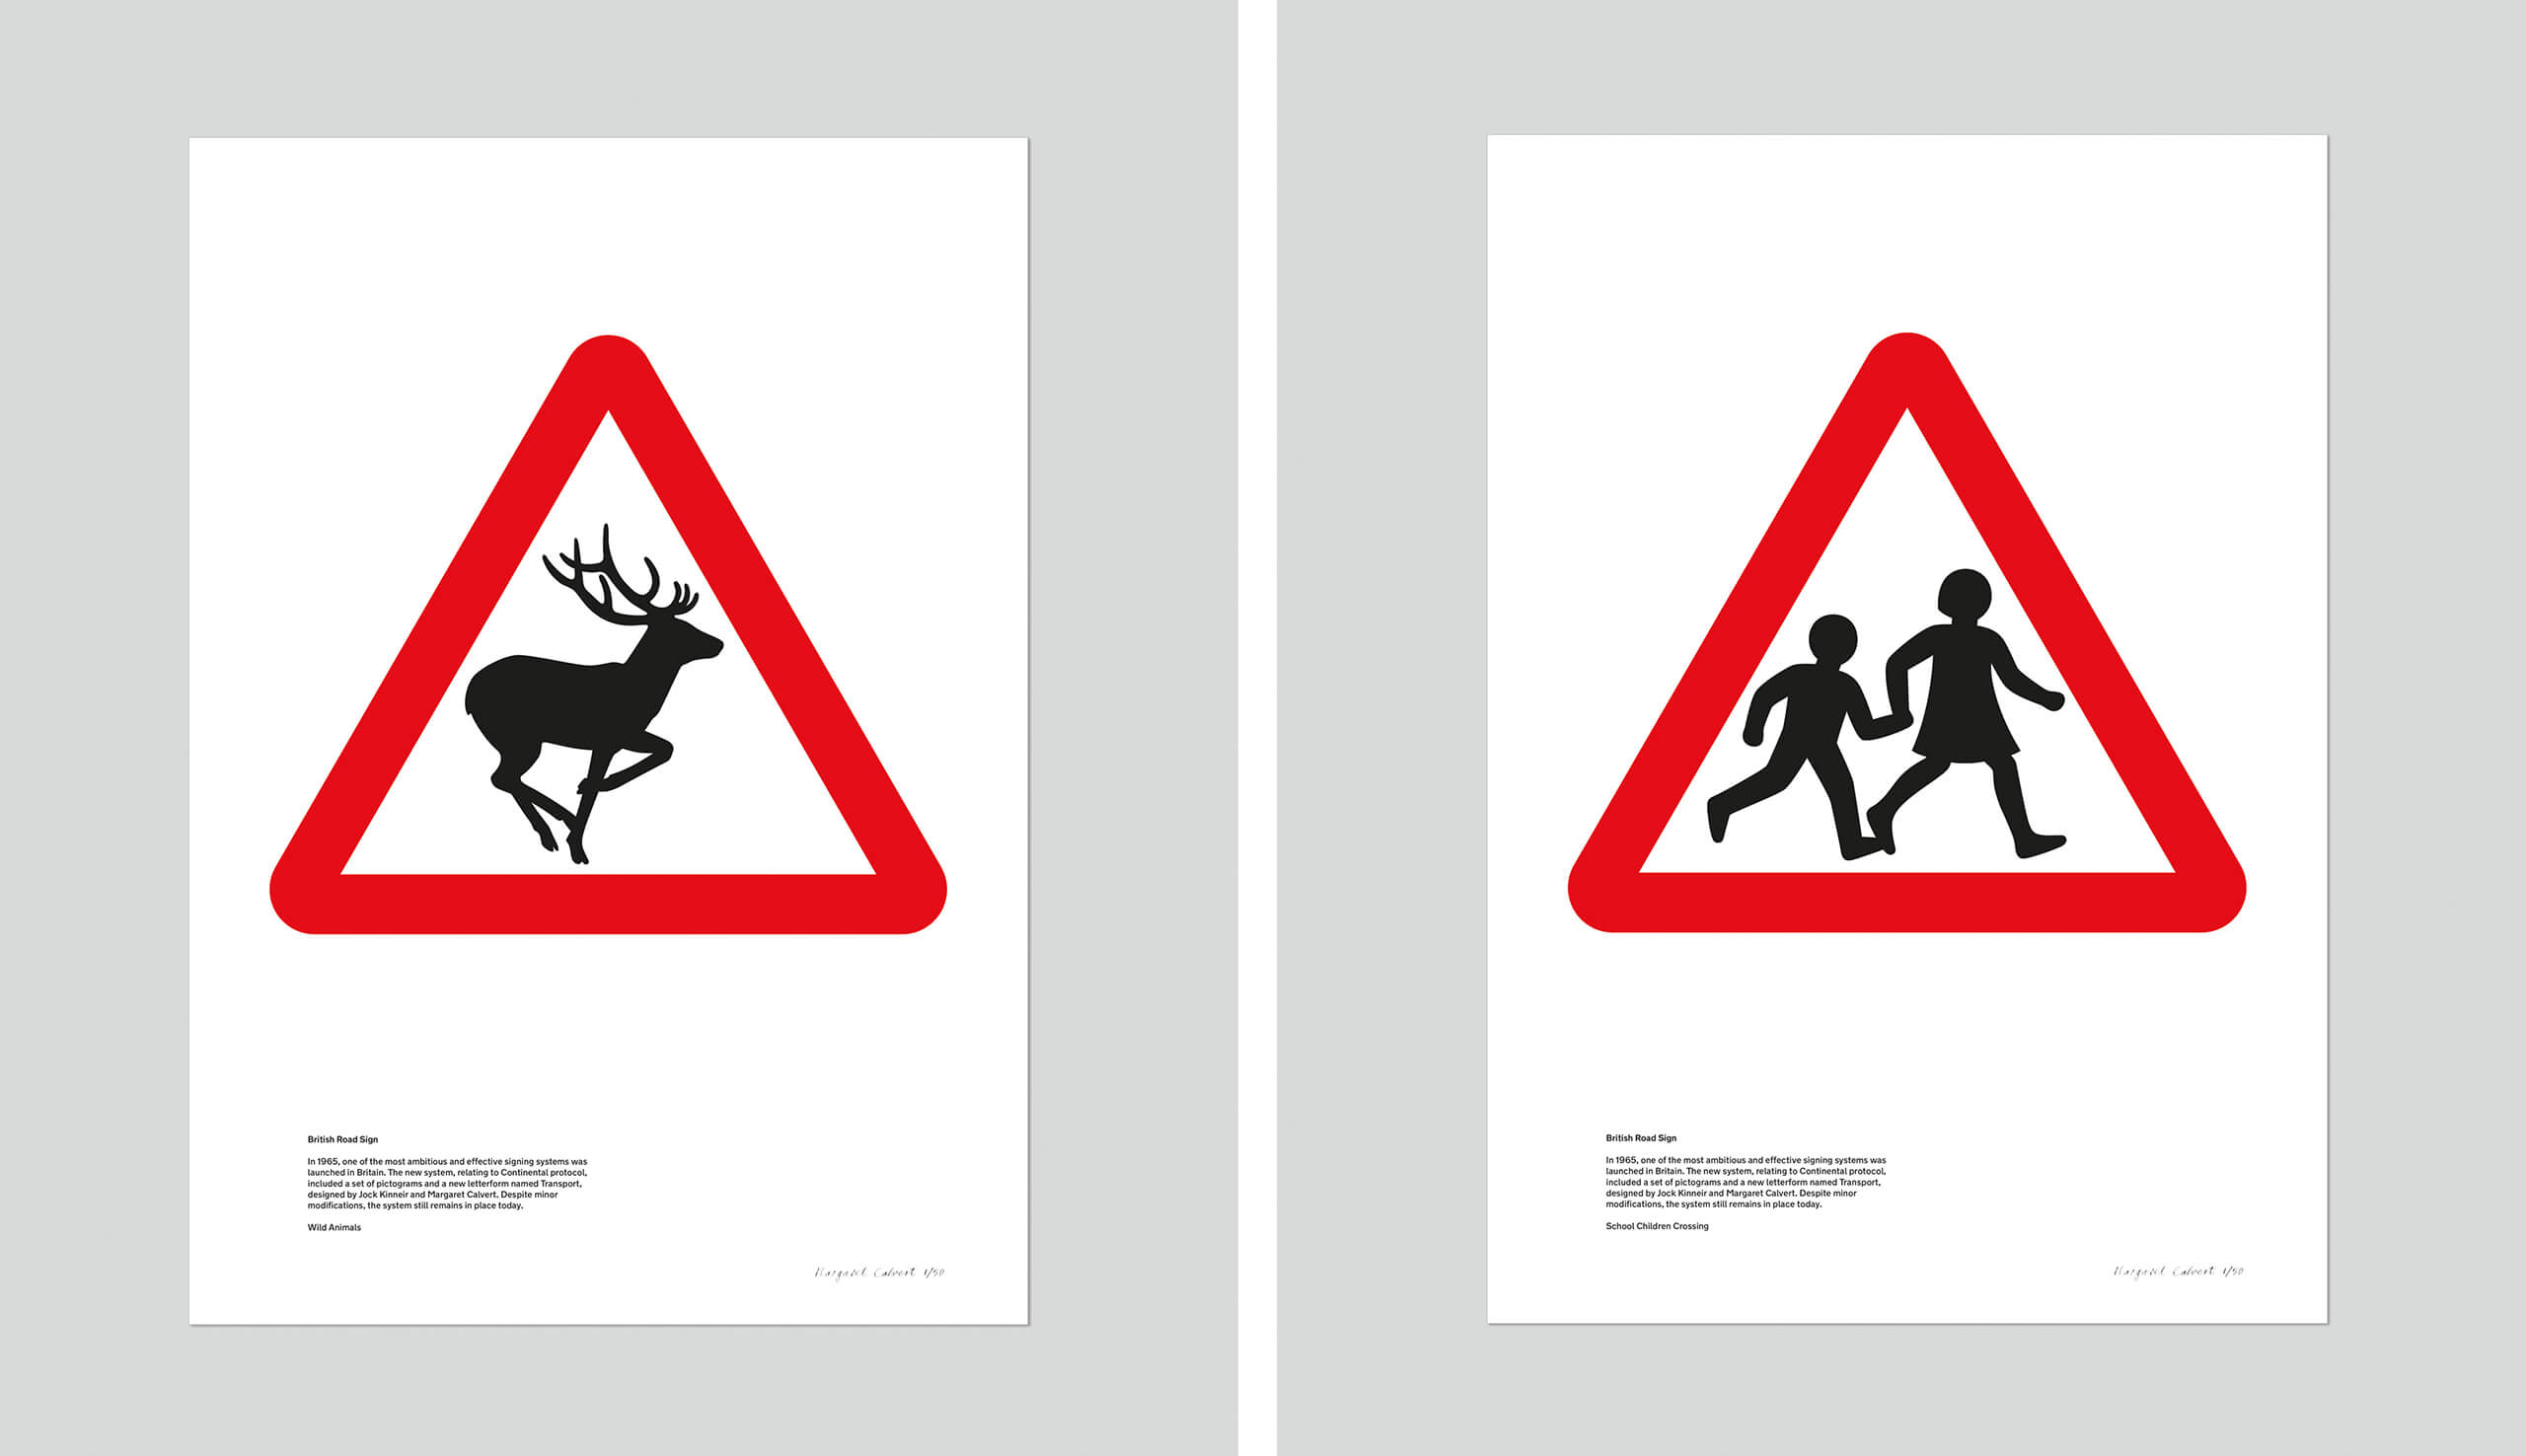
The next step in this exercise was to research existing signs and symbols. When I first read this brief there was only one designer who sprang to mind – Margaret Calvert who designed and implemented signs and symbols for our roads. I decided to refresh my memory on her work.
Margaret Calvert
Margaret Calvert is a famous British typographer and Graphic Designer who designed many of the existing road signs on the roads in the UK. Margaret also designed the typeface “Transport” which is also used on road signs.

Calvert was South African born and bred, she moved to England in 1950 where she started studying at the Chelsea College of Art. Her tutor there named Kinneir, asked her to help him design the signs for Gatwick Airport. They both chose the black on yellow scheme for the signs after researching that this was the most effective combination.
In 1957, Kinneir was appointed as head of signs for Britains roads. This worked out well for Calvert as he asked her to redesign the road sign system. Calvert came up with a very simple and easy to understand approach by using pictograms. Some examples of this are:
- “men at work” (A man digging) – Calvert would appear on an episode of Top Gear where she would try and defend this controversial sign which to many looks like a man is having a fight with an umbrella!
- “Farm animals” – This sign was based around a cow called Patience that she grew up on a farm with as a child!
- “School children nearby” (A girl leading a younger boy by the hand)
All of her signs used triangles and circles; triangles showed warning whilst circles showed mandatory restrictions.

Signs and symbols are everywhere. There is a saying which goes;
“It is always better to show than to tell.”
Signs and symbols have the power to cross language barriers and can help to engage with an audience on a deeper level other than just words. Symbols are universal. Where words fail us, a sign or a symbol communicate a message quite simply and effectively. In my opinion what makes a successful sign or symbol is one which does not need any written word beside it.
I read and own a book called “GO” by the Graphic Designer Chip Kidd and in it he wrote about an image of an apple and the fact that you do not need to write the word “Apple” above or below it to convey that it IS an apple. The symbol or picture speaks for itself. This is the link to the TED talk relating to this:

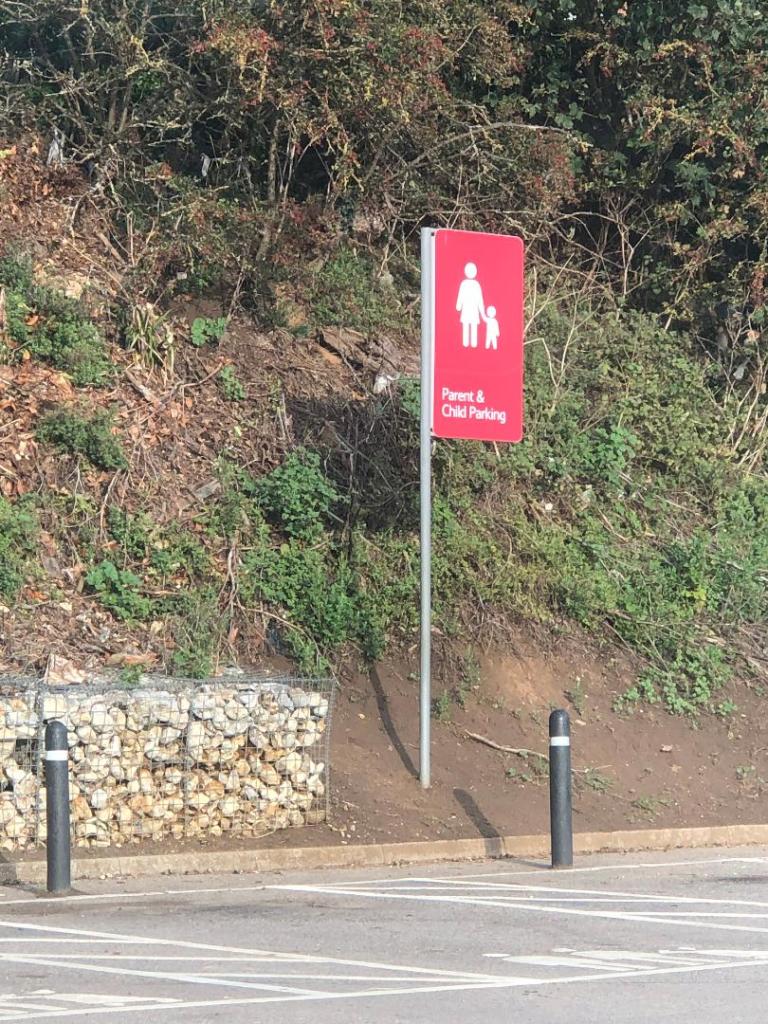
Driving out and about signs and symbols are everywhere. These are just 2 that I decided to photograph in Hunstanton whilst I was sat waiting in the car in Tesco car park.

The most commonly used symbols worldwide are:
- Arrow symbols: used to represent directions
- Cloud, rain, snow and sun symbols: used to represent weather
- Power, disk, wifi and bluetooth symbols: used to represent tech
- Wheelchair, information, bathroom and no-smoking symbols: used on different signs found in public places
These are known as universal symbols. There is no language barrier; everyone from any background, culture or country can understand what they symbolise and mean. They are understood immediately with no ned for explanation.
Sign and Symbol shapes
It is not just the symbol itself though that needs great thought.. it is the shape that the symbol goes within. Different shapes represent different meanings.
- Circle: Completeness, cycles, continuation, playfulness
- Square: Stability, tradition, security, straightforward
- Triangle: Transformation, movement, balance
- Intersecting lines: Relationships, connected
- Spiral: Growth, evolution, transformation
- Five-pointed star: Excellence
- Arrow: Direction, movement, force
- Curved lines: Movement, connection, fluidity
- Diagonal lines: Tension, excitement
- Zigzag: Path, confusion
Circles and Triangles are the main shapes used on signs. Circles symbolise something that has to be conformed and adhered to whilst triangles carry warning. Triangles are renowned for their harsh sharp edges which carry warning in itself alone.
Sign and Symbol colours
The colours used within signs and symbols is another very important factor to consider. Signs need to stand out and be visibly noticeable right before you even reach them and the only way this is going to happen is with the use of simple contrasting colours. Black and yellow contrast each other and stand out. Black and yellow are always used in warning signs. Red and white are other commonly used colours.. particularly in the road signs by Calvert.
From looking at this research I had a good idea of where I wanted to go with this brief…
Initial Ideas
I knew that I wanted to use the word “Danger” as my chosen word to design for. From looking at the metaphors I researched, I knew that I wanted to explore “Playing with fire”.
I knew that I did not want to over complicate the design, it needed to be the simplest possible form, no use of words and clearly communicate the message of DANGER.
Playing with fire is very self explanatory. When you play with fire you are putting yourself in great risk of danger. When you play with fire you are usually well aware of the hazards and danger involved but pursue it anyway.
With this mentality in mind, it gave me the vibe and feeling of children messing around; children playing with fire. This led me back to my research around Margaret Calvert; the schoolchildren road sign. What if I could design something very similar to that of what she did but portray playing with fire instead?…
With this idea in mind, I had visions of a triangle warning sign with an image inside of children literally playing with a fireball. I did need to convince myself however that if I created a very similar sign to those of Margaret Calvert that I would not be seen as copying her work.
In the brief it states;

I will read existing signs (Margaret Calvert’s) and then drawing on their visual language (using their designs as inspiration) create my own.
In the back of my head I remember an interview with Chipp Kidd where he explained how he sourced the inspiration for his book cover designs; he regularly stole snippets, photographs, scans or past designs of other peoples work to use on his own and manipulate or change. Making work similar or copying other designers work is always a grey shady area.. but I decided I would use my own silhouette drawings of children and I made sure that there was no existing signs for playing with fire. I asked for the second opinion from my boyfriend, who is a teacher (although a teacher of motor mechanics – no design knowledge at all! :p) and he was also in agreement that the brief is pretty much asking me to create something very similar to what already exists. I am not trying to reinvent the wheel here!
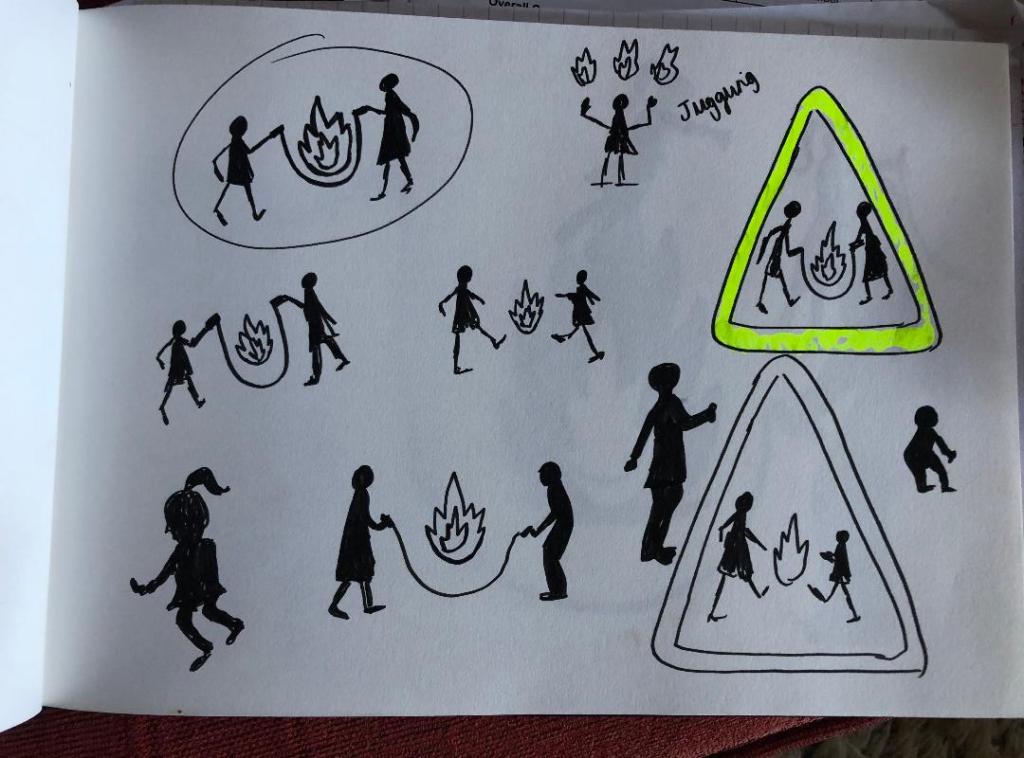
From this point I started sketching some rough drawings. I wanted to make the “playing” part very clear. As soon as you look at the sign the message of “play” needs to be very clear. I pondered using football and other ball sports which could include the use of a fireball but the idea of skipping was very dominant in myself and my boyfriends mind. The idea was to have the 2 children holding a skipping rope either side and the fireball is playing in the middle. I think the idea works. It is simplistic, snappy and easily understood.
These are the first sketches of this thought process;
Once I had the initial idea in place, the next step was to perfect the poses of the silhouette children, they needed to differ from those that already exist of Margaret Calvert but they still needed to be simple to understand and have a posture that would appear as though they are playing.
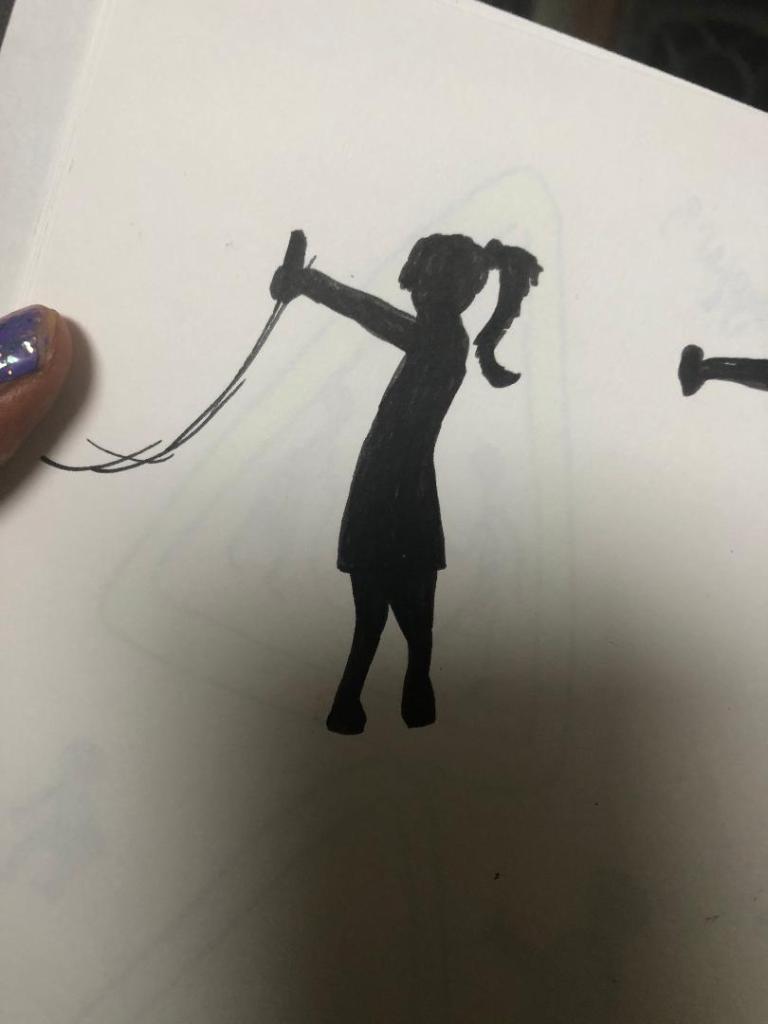
I like this pose of the girl. It is clearly visible that she is a girl and her pose is very naive and playful.
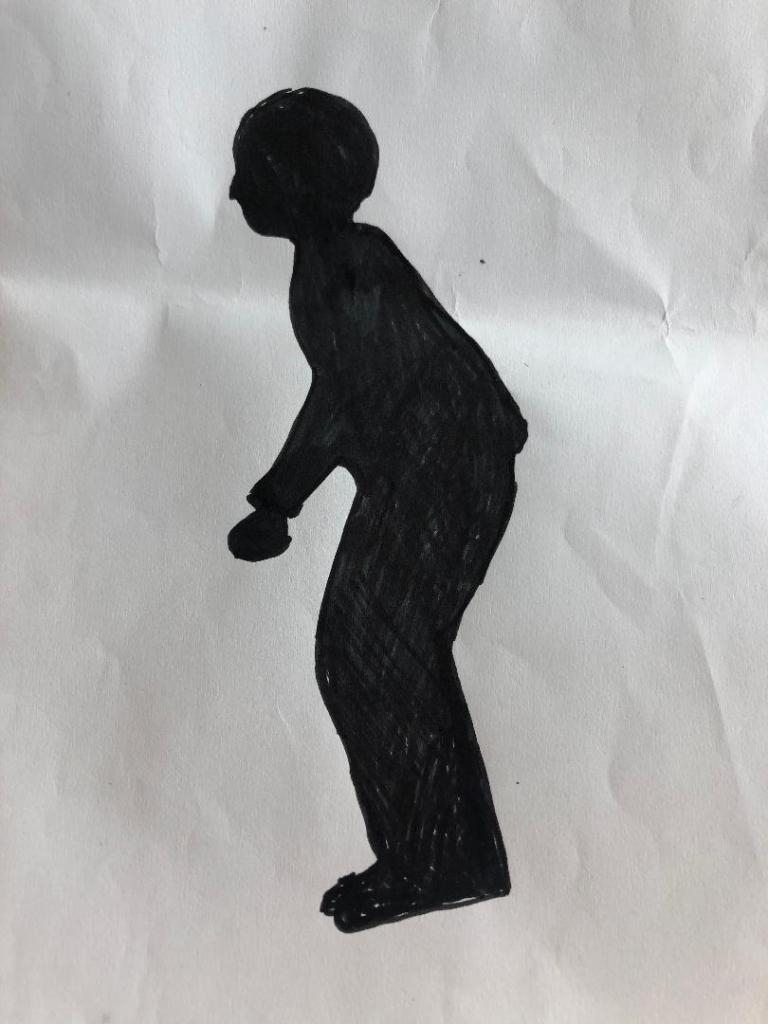
For the boy I played around with the idea of him squatting as if he was to jump or that he is moving in time to the rope swinging. His pose is not ideal and needed work.
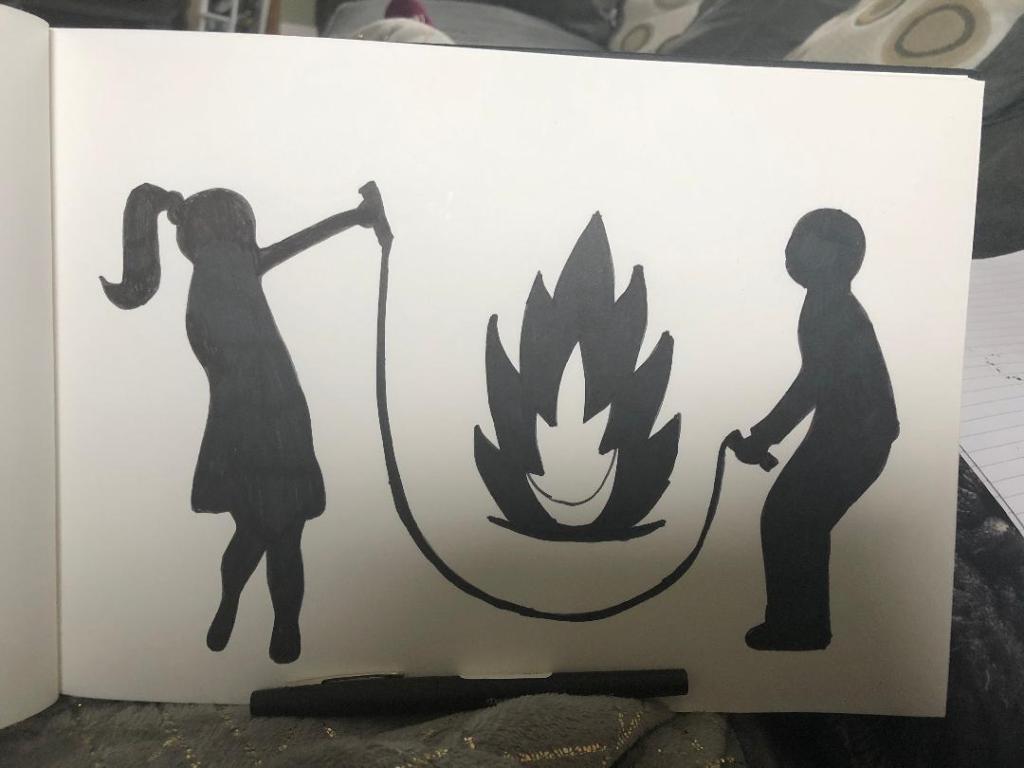
This is a rough mock up drawing that I have done of the 2 children and the fireball. There was much need for improvement on this design. The girls arm was too high up in her face and her other arm needed to be included. The boys posture was not ideal.. he looks like he is squatting from a great height off the toilet seat! – I remembered the flack that Margaret Calvert received for the men at work sign looking like an upside down umbrella and figured that if mine was a sign to actually be used in public it would be mocked considerably more!
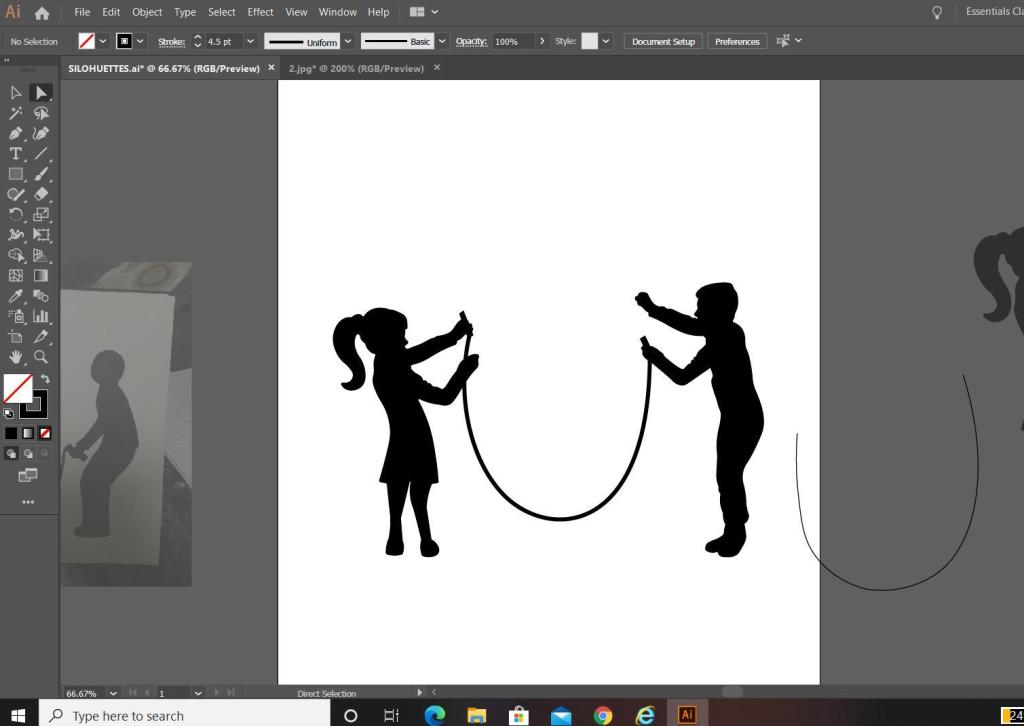
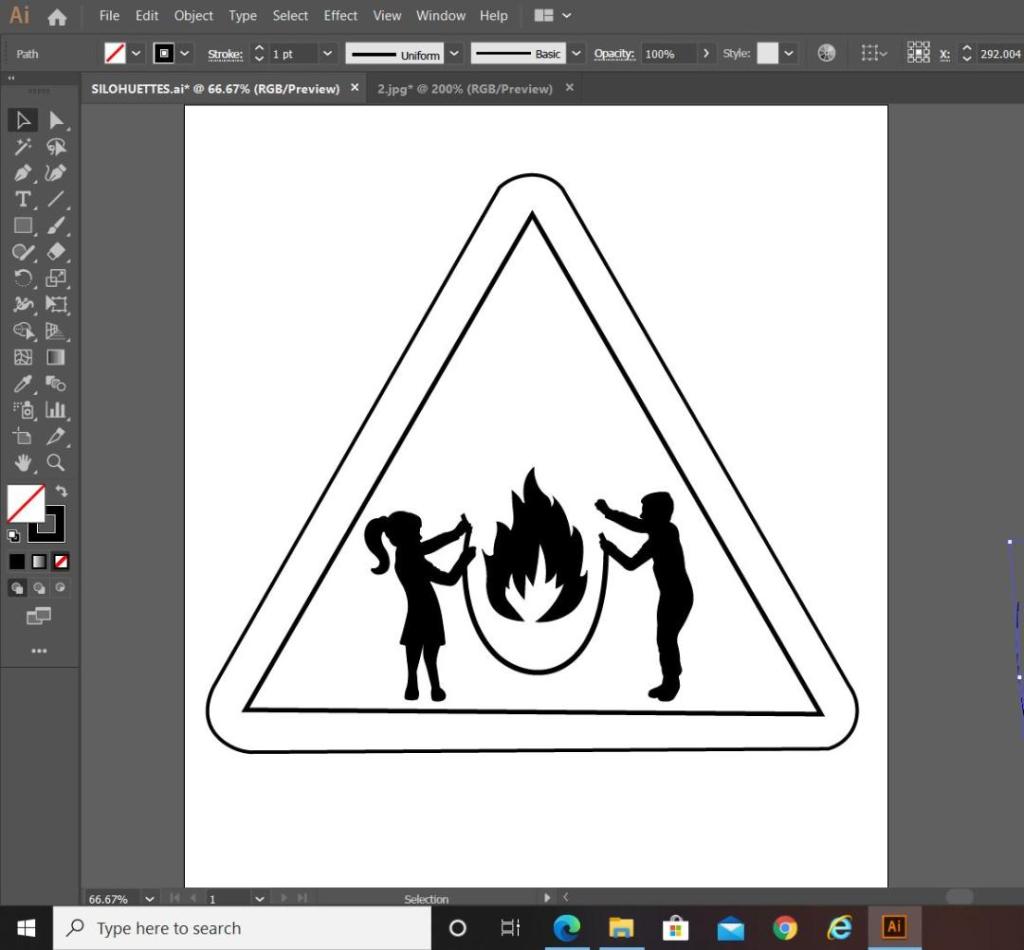
With this in mind I decided to re-look at the silhouette shapes of the children. I decided to take a photo of what I already had drawn in rough and then import it into Illustrator to draw around in there and adjust accordingly.

The above screenshot is from Illustrator. It shows the original shape of the girl that I drew on the left hand side and how I altered her into the middle girl that she now is. I altered the shape of the boy completely from the rough drawing that I originally drew of him – this version shows more movement and looks far more playful. I altered the girl slightly by copying elements from the boy (the nose, side profile of the face and the arms) and merging it into the middle image of the girl.
The next step was to add the skipping rope into the equation. I used the pen tool to create a perfect arc shape for it and then added handles in the hands of the children. I played with the thickness of the rope; I chose in the end to keep the rope thick in appearance to match the rest of the sign, I did think about making the thickness (or weight) of the rope thinner to give contrast to the image and to potentially break elements up to see if it would be clearer on the eye but swayed against this decision because it all needs to be bold to stand out as a caution sign potentially from a distance.
I then went on to draw the sign to put the symbol inside. The sign is a triangle warning sign, but as soon as I placed the symbol into the triangle shape I realised that I had a potential issue…
My symbol did not fill the whole inside of the triangle shape; it only filled the lower half, I knew I would have to try and play around with the sizing and positioning of the symbol itself to try and make it more dominant within the triangle. Firstly though I added colour to see how clear it works as a sign.
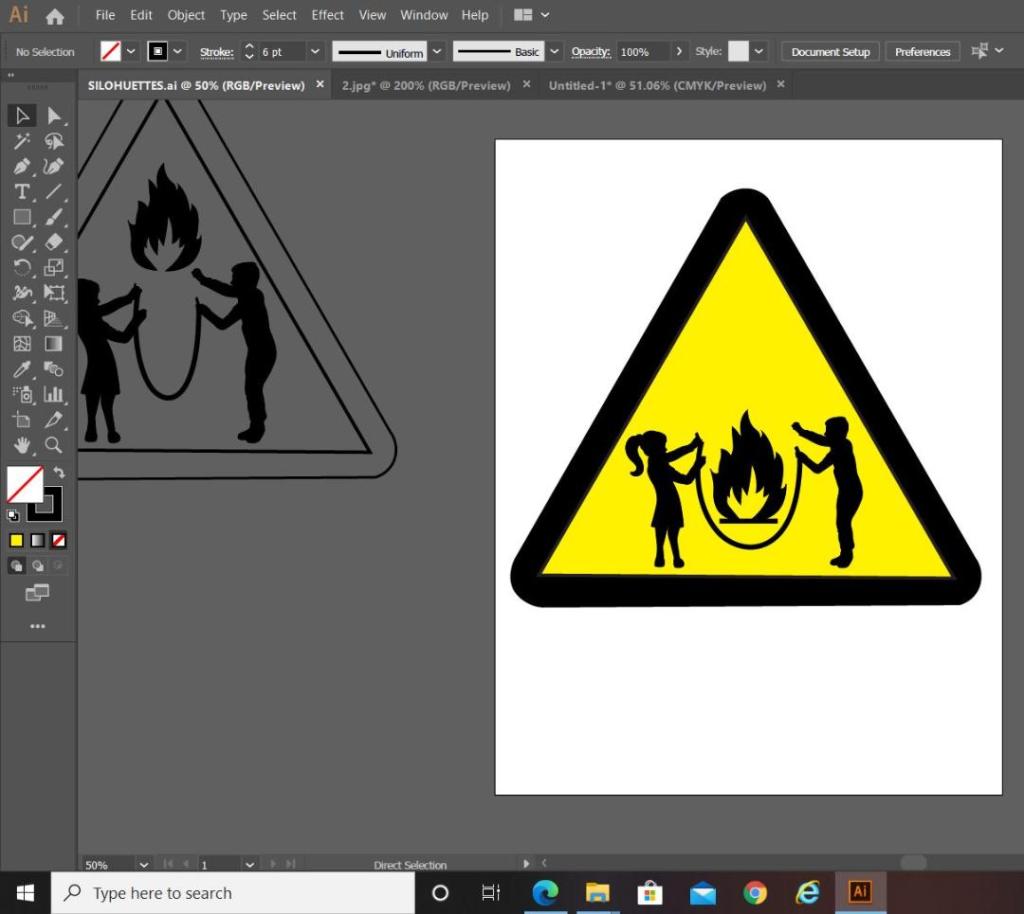


In the images above I was playing around with the positioning and sizing of some of the elements on my symbol. On the far left hand image (on the grey art board) you can see that I tried to decrease the gap between the children and made the skipping rope smaller and narrower; this did not work at all, the image looked distorted and squashed. The only way to make the symbol fit within the triangle shape better was to heighten the size of the children, push them together a tiny amount adjust the skipping rope accordingly. I also played around with the positioning of the flame symbol; I wasn’t sure if I wanted it to appear above the skipping rope or within the rope. Placing it above the rope shows that it is being tossed in the air by the rope, however with it placed within the rope it appears larger and also the eyes attention is drawn to the symbol as a whole rather than to different elements in different areas. The children’s arms are also high in the air and I wasn’t sure if I wanted the flame to be that little bit higher so that it appears as though they are trying to reach out and touch it as it is being flown into the air by the rope. My eye though is drawn to several different areas of the symbol when I separate it this way; with this in mind I think it is better to keep the flame low within the rope.
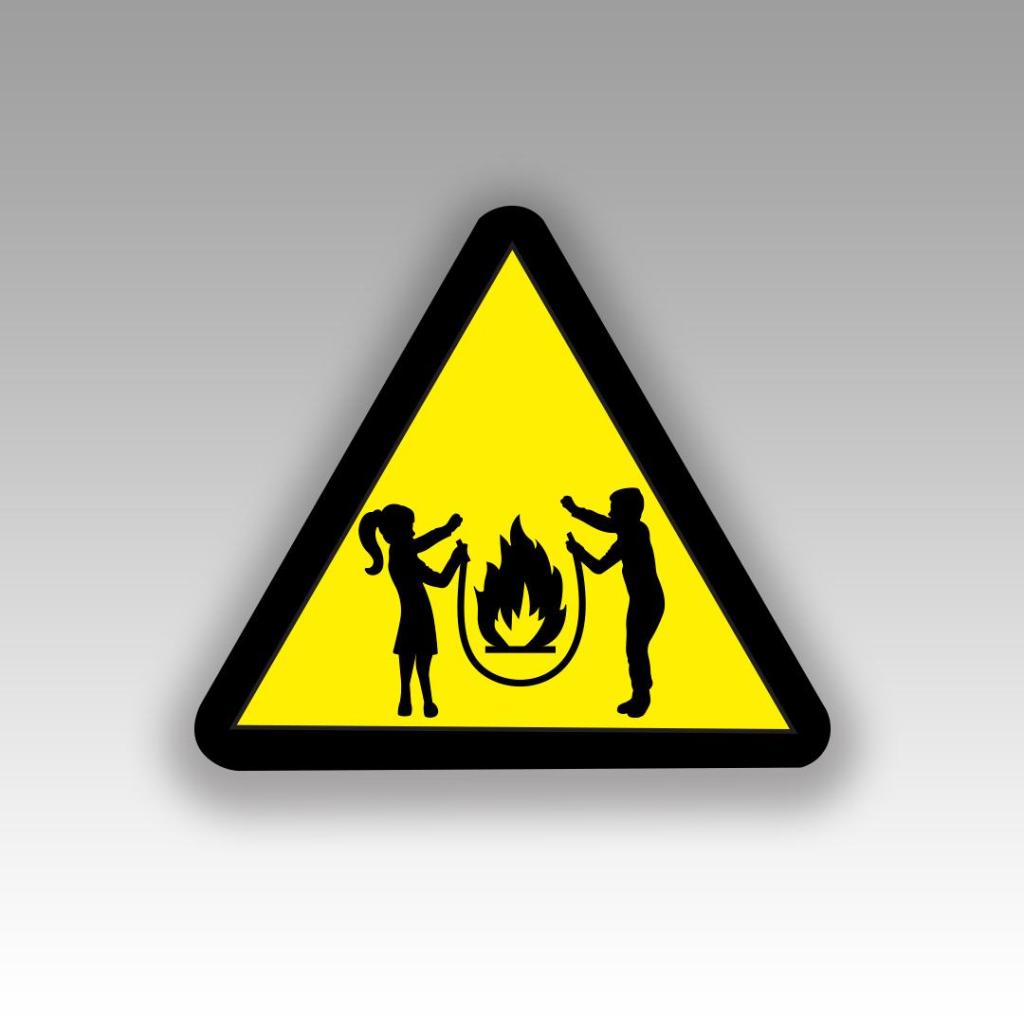
I decided to end this exercise on the above final symbol design.
I heightened the length of the children and kept the flame low in the rope to keep the eyes attention on the symbol as one whole image other than separated elements within the triangle.
Overall I am pleased with how it has turned out. I think I have met the brief by drawing on inspiration from existing signs and symbols, choosing one of the words I was given and by including a metaphor that linked to my chosen word “Danger”. I have looked into the design theory behind what makes symbols and signs effective and I have tried to include that into my own design. I would like to think that it is obvious when looking at this sign what I am referring to.
