Assignment 1 – Say Hello

The Brief –

For this assignment I wanted to introduce myself through Pink Angeleno as this is how I brand my work on social media and on this blog and I know that my tutor already knows who I am and what my work is like, but many people always ask me why Pink Angeleno is Pink Angeleno.

Pink Angeleno was born in 2019 when I first started my course, I needed a brand name that represented me and my work and I was really struggling because I had no idea if I was actually good at Design or whether it was just a pipe dream. I had no idea who I was at that point, where I was going, what I was doing or whether what I was producing was any good. I felt absolutely lost and just dreamed of running away to live a happy, sunshine-unicorn-rainbow life in LA! I do love LA and California and held on to the dream that I might make it back there one day.. I was like an Angeleno that was just lost and living elsewhere! I also loved the colour Pink and this is the colour that everyone associated me and my designs with. it only seemed appropriate that the original name I chose – “Graphically Pink” morphed into Pink Angeleno. I wanted the energy, the fast pace, the colours, the vibes, the excitement and adventure, the street art, the hidden places and the glamour of that lifestyle. I wanted Pink Angeleno to showcase my OCA work but I also wanted it to represent this “pipe dream”. As it turned out though, Pink Angeleno has served me well as I have returned to LA and I know where I am going as a Graphic Designer.

I wanted to come up with a design that would be suitable for this assignment but something that I could also use moving forwards to represent my brand.

I explored in my mind the boundaries of the brief… The brief stated “greetings card” but I wondered whether a post card could class as a greetings card. After doing some research and searching Google for some one sided “post card style” greetings cards, I realised that they are two very separate things and that I should stick to what the original brief wanted.

The brief allowed any type of media but I decided to do this assignment digitally using Illustrator.

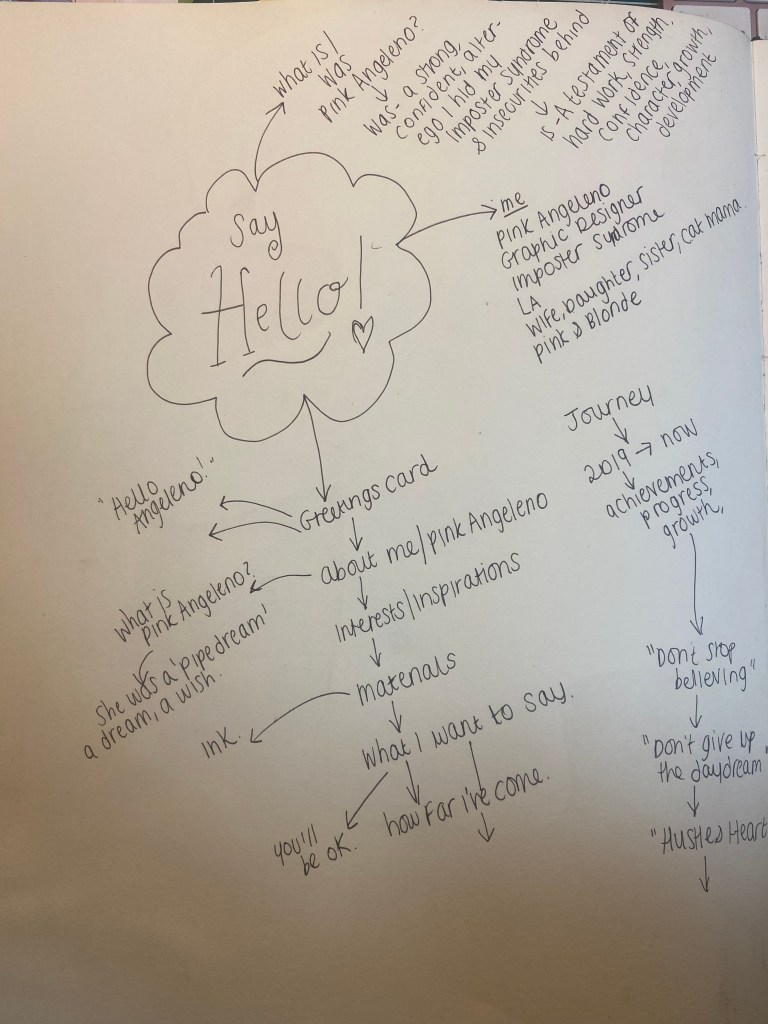
I started off with brainstorming some ideas in my sketchbook about what I might want to include on my design:

*The photos of the Roses on the page are nothing to do with this assignment but I am trying to document as much as I can in my sketchbooks – I had a lovely evening of dog sitting my Dads dogs and he lives in a countryside 1600s house with a big garden full of amazing flowers and I sat down on this night with a glass of wine, cut a rose from the garden, lit the fire and sat down to sketch. It was bliss.. so I decided to document the moment!

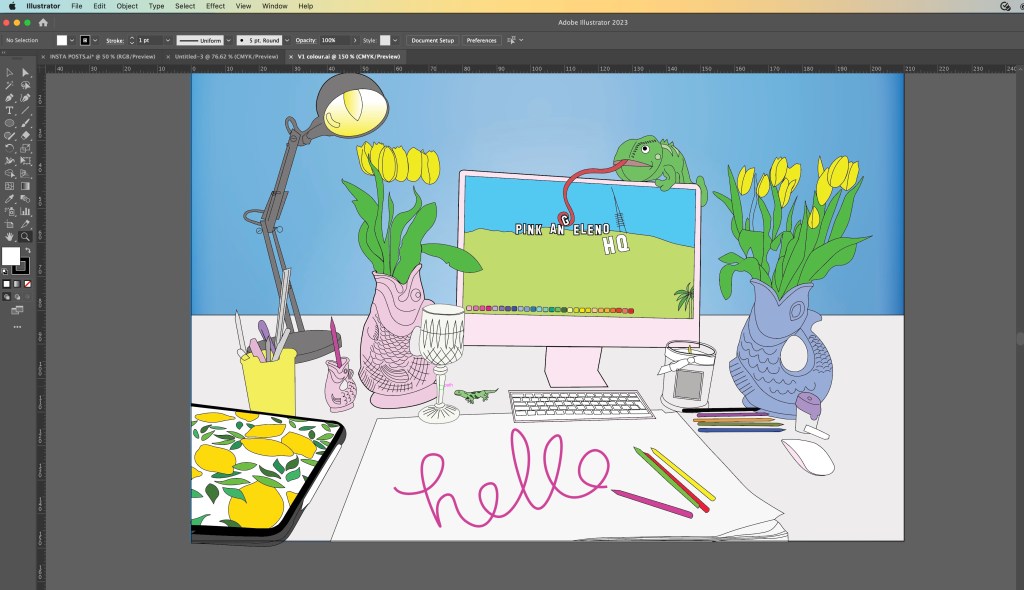
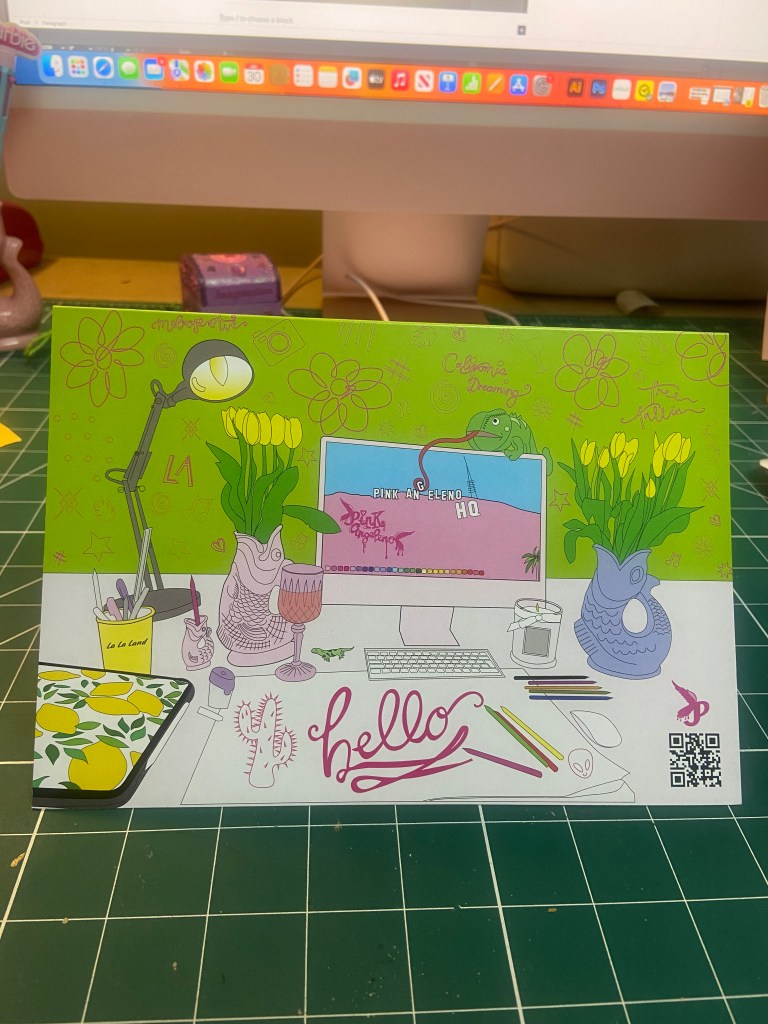
I sometimes on my social media post a photo of my desk space with the caption “Greetings from Pink Angeleno HQ” SO I decided to move forwards with this idea. I had the idea to illustrate my working space on the front of the card. I then had the idea to make the card have a design on the front and the inside and allow the design from the front to flow on the inside of the card. How I imagined this was to have my Mac on my desk space have a wallpaper which would then continue onto the inside. The wallpaper I had in mind was the Hollywood sign and then on the inside of the card I would illustrate more of the Hollywood Hills from a photograph I actually took whilst I was hiking the Hollywood Hills and include some little illustrations around the outside of other things in LA that I liked which would sum up my interests and why I called Pink Angeleno “Pink Angeleno”.

I also explored the idea of pop up cards and more complex designs – I later decided to keep it simple though as this is an introductory, simple brief and I felt it didn’t require the complexity. It would also be easier for the print process being one sided and a simple A5 tent-fold card.

I took a photograph of my desk space:

From the photograph I then drew out the first initial drawing of my desk space in Illustrator. I missed out the non important “clutter” and kept the essential items from my desk space. Once I had the basic drawing I could then go about adding colour:

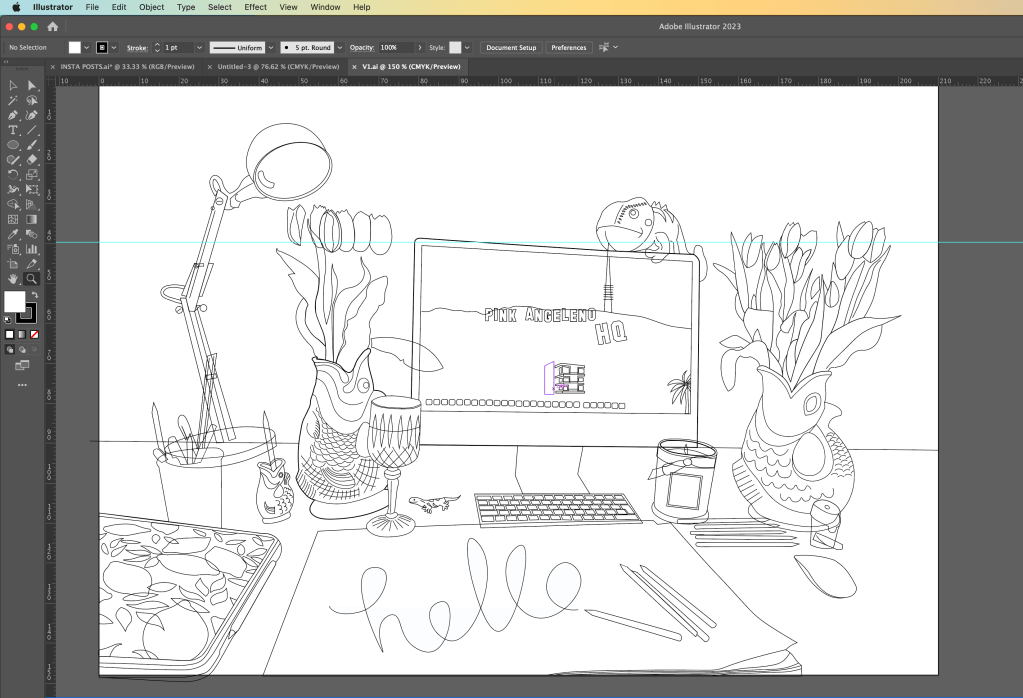
I added colour and I just didn’t think much of it. It had everything in the illustration from my desk space but it didn’t show Pink Angeleno… there was nothing pink truly about it and the only element that hinted on LA was the wallpaper on the Mac. I have my cuddly toy chameleon (George!) sitting on top of my Mac and thought it would be fun to make him interact with the screen in the illustration!

I then sat and thought more about Pink Angeleno and how to best illustrate this on my greetings card. My current Pink Angeleno brand was neither here nor there.. I had a drawing I drew for my first ever OCA assignment which was a similar one to this… Create a postcard sharing who you are and the illustration I created for this I have kept as part of pink Angelenos identity all the way through. it is significant as this is how people identify my design and work and it is how It all came about:

I knew that I cannot reuse old work, but I then wondered if I could update Pink Angeleno which would help with my assignment and also create more of a solid brand for my work moving forwards.

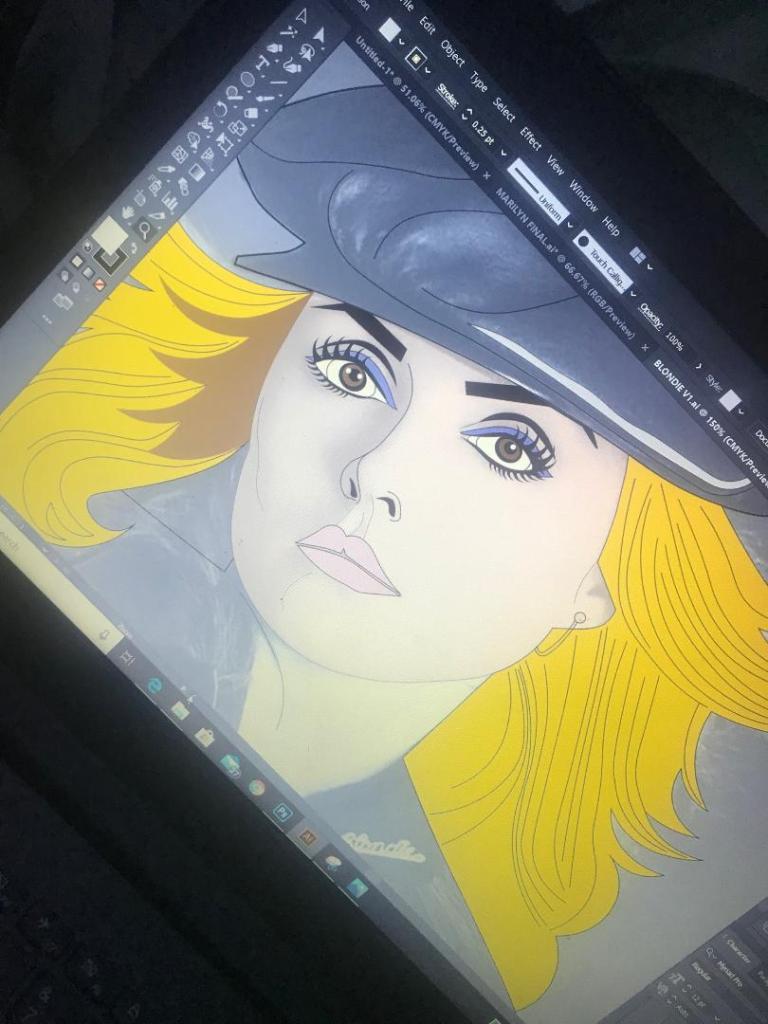
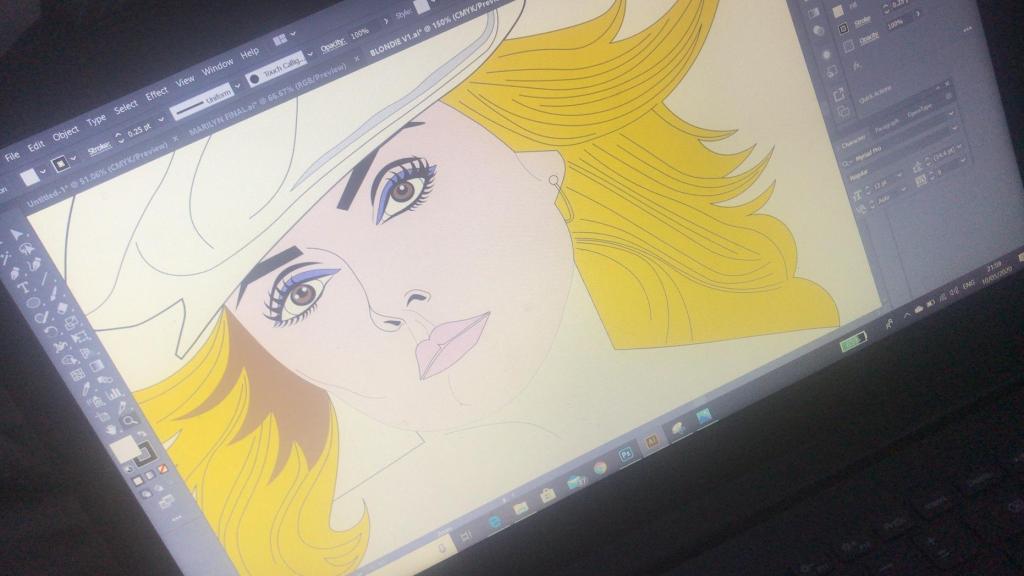
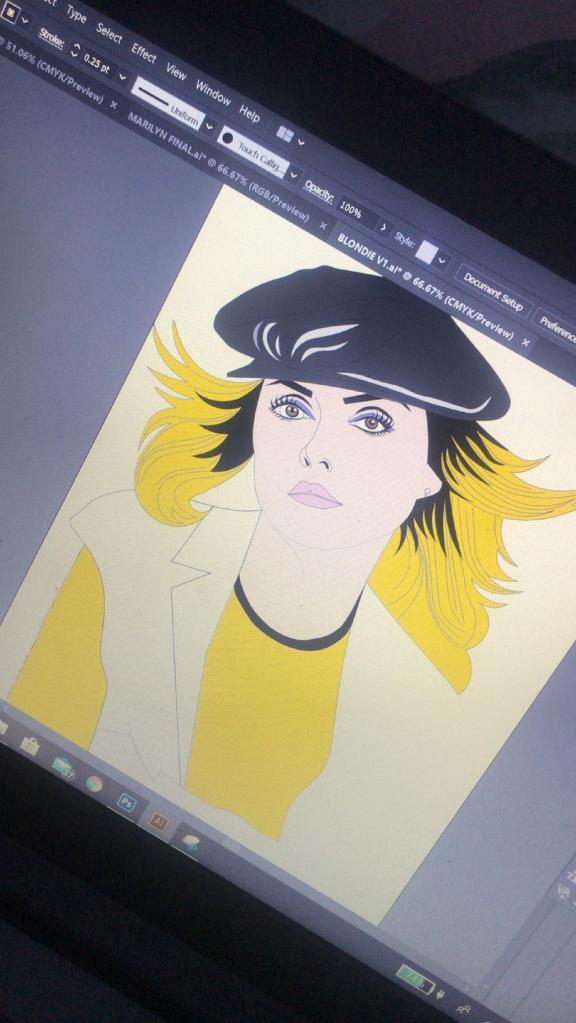
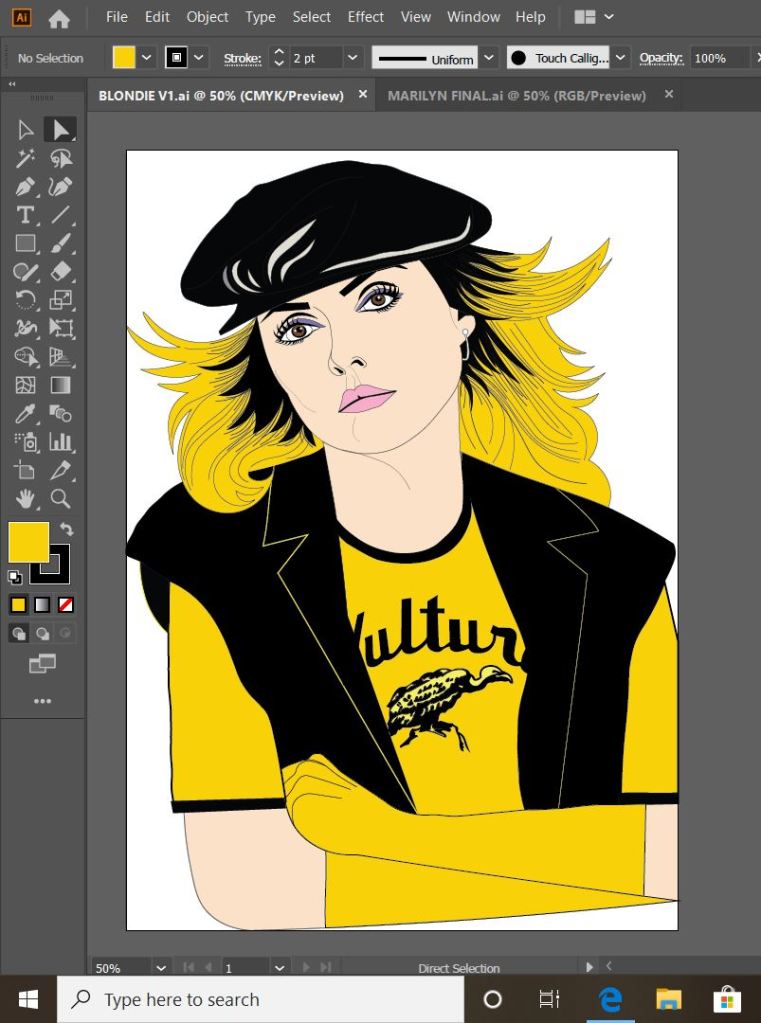
Pink Angeleno is very vector based, a lot of my work are illustrations that I have drawn and then created into Vector art using Illustrator so I knew that my work for this assignment would be the same.

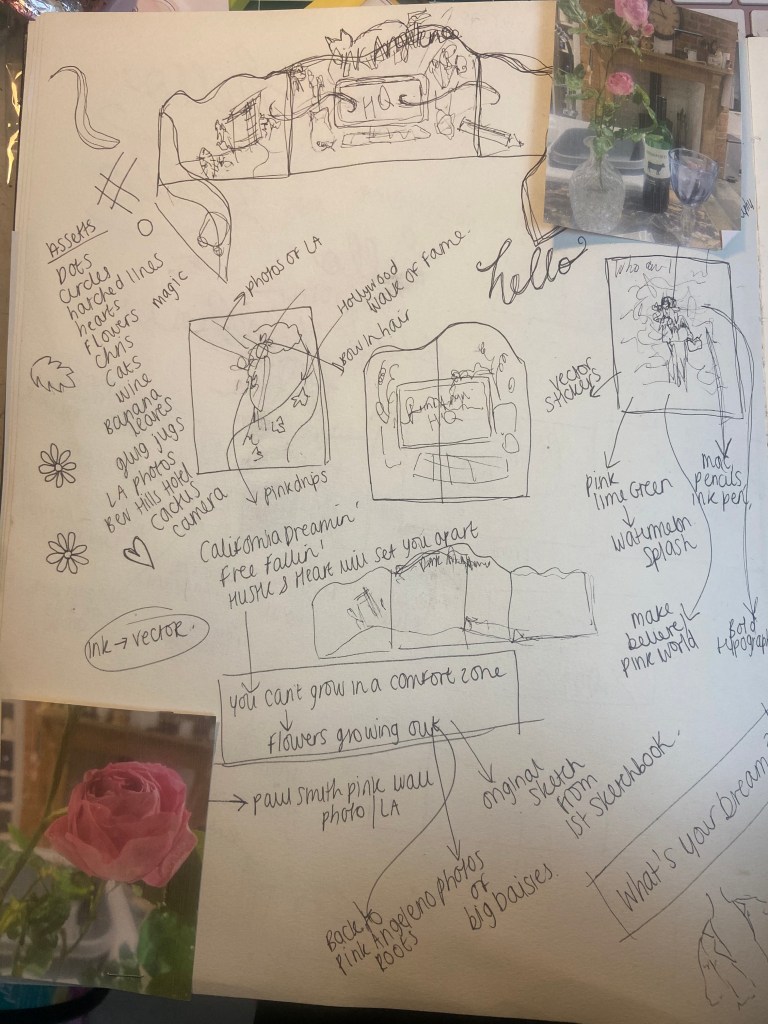
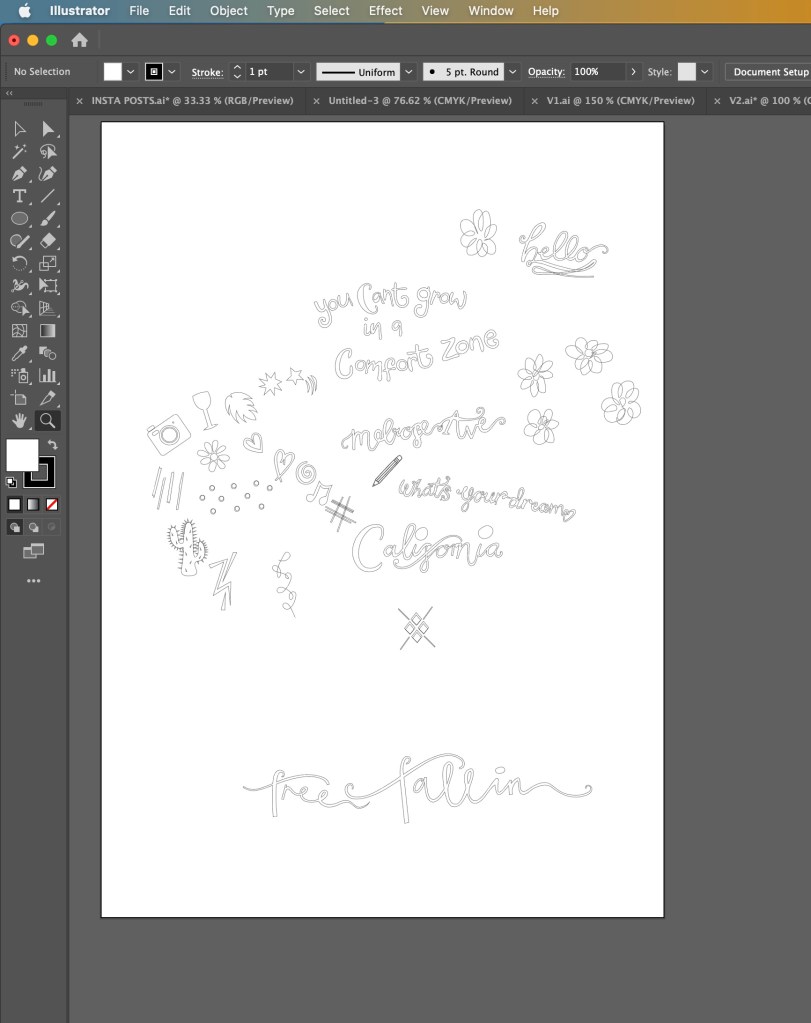
Once again, I turned to my sketchbook and started to sketch out little ideas that I feel sum up what Pink Angeleno stands for.

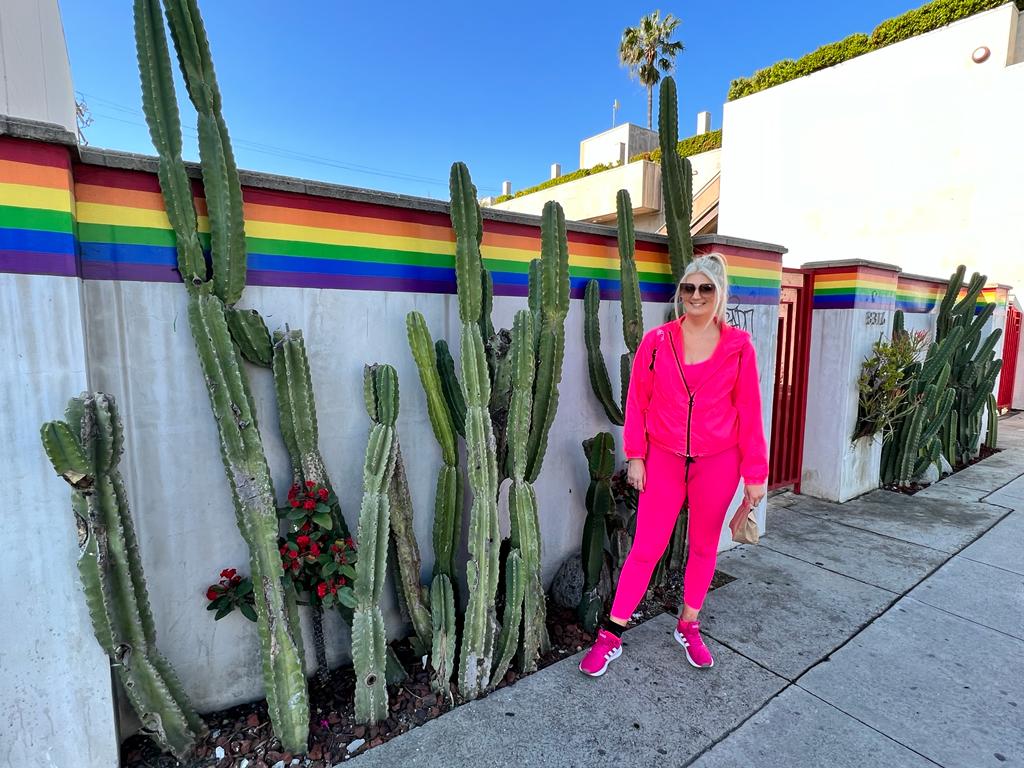
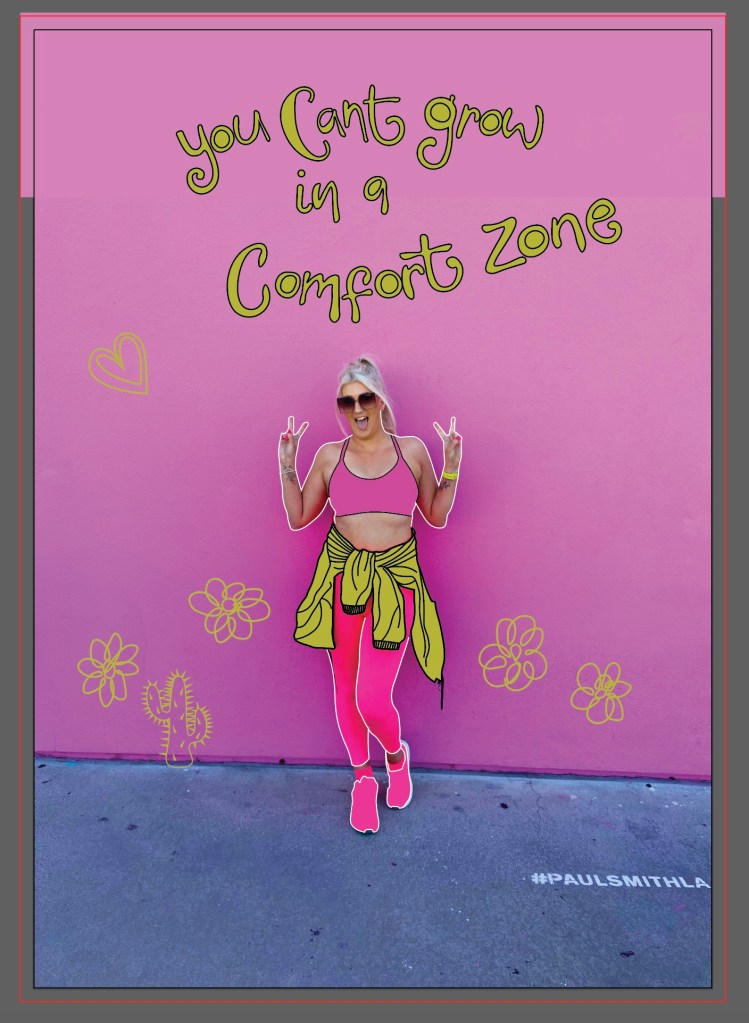
“You can’t grow in a comfort zone” is pivotal to me – it is what made me jump out of my seat and go for it in the first place. in my first ever sketchbook I drew a random doodle of this so it was only relevant to use it as part of this. Free Falling, a song by Tom Petty describes the emotion of wanting to fall off the top of the Hollywood Hills – it is I believe a song about getting out of a relationship but I associate it more with a feeling of escaping reality – that is very much the basis of the origins of Pink Angeleno. Melrose Avenue is just a cool place – shady in some areas I guess- but just a cool place! It is full of street art, graffiti, bright colours, thrift shops, unique bars and everything quintessentially LA!

Here are a few snaps I took of Melrose:

Cool right?… oh… also, here is my husband enjoying it too! – (with my Barbie bag!) 😛

“What’s your dream?” is an iconic line from Pretty Woman the film that I just had to include.

From drawing all of these I then had the idea to scrap the original idea and use the photograph of me in front of the Paul Smith Pink wall as a basis for a completely new idea..

I thought about using the photograph to create something like this:

I put both ideas on the back burner until I had drawn out my illustrations:

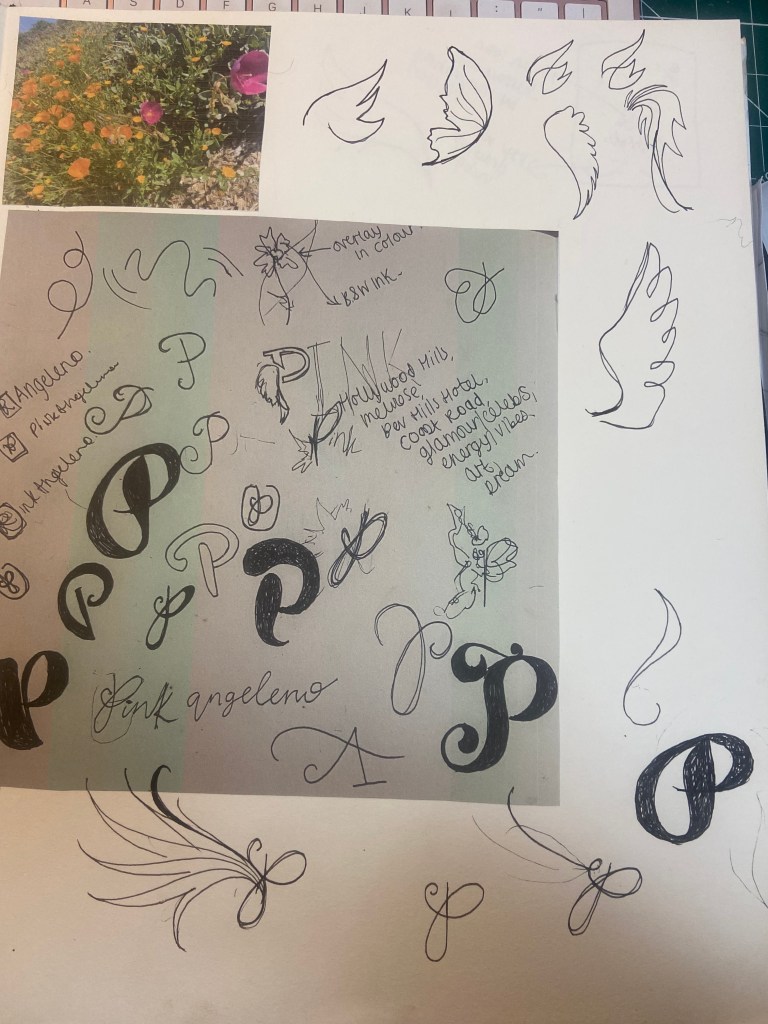
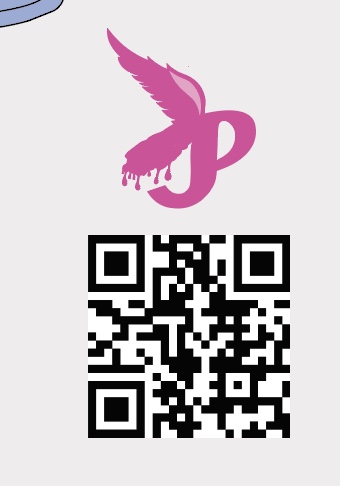
I then figured I needed to rebrand my Pink Angeleno logo ever so slightly.. the first ever original drawing I did for it was back in 2019 and I didn’t know or take into consideration then the readability and size of it when making it as part of a logo..

After a lot of thought though I didn’t want to lose the original identity of it as it means a lot to me so I went to work adapting it and making it as part of a basic logo.

I sketched up some more ideas for a logo – these manifested as a simple letter P with angel (or Angeleno) wings:

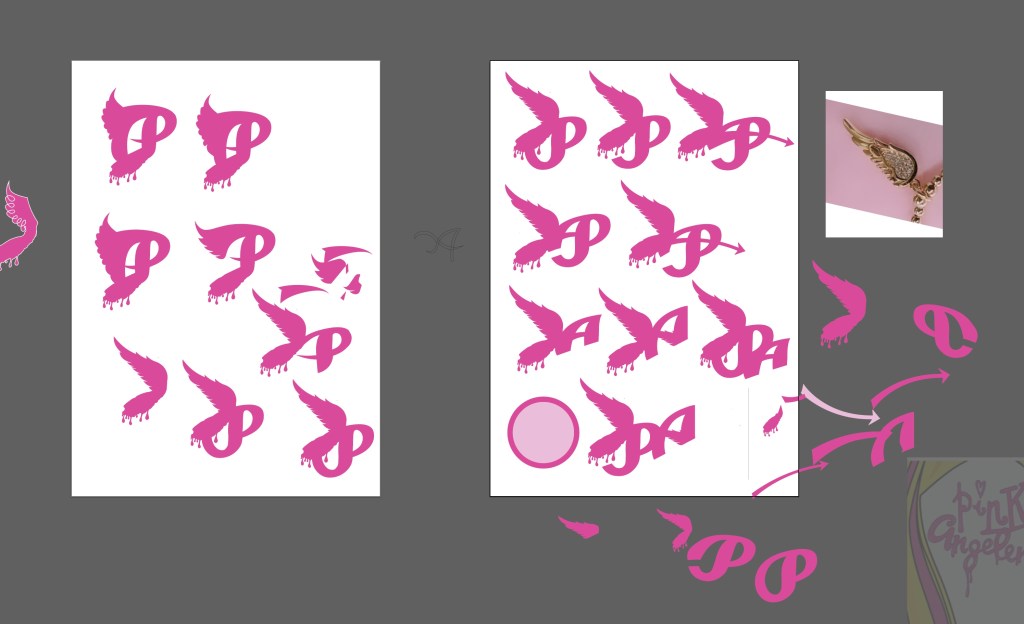
This was the final logo that I settled on and I quickly made it as part of my social media!

I also gave my original drawings a “glow up” and adapted them with my illustrations from my sketch book.

I then went back to both of my ideas for my greetings card and decided to go back to the first original drawing and idea but just to include the recent illustrations I had drawn. I used the colour combo of Pink and Green just because I love the colour pop and the colours remind me of a Watermelon, summer splash combo!

The colours of it here are extremely bright and vivd because I have saved it as a RGB PNG suitable for screens; however the file format I saved for print was a PDF format:

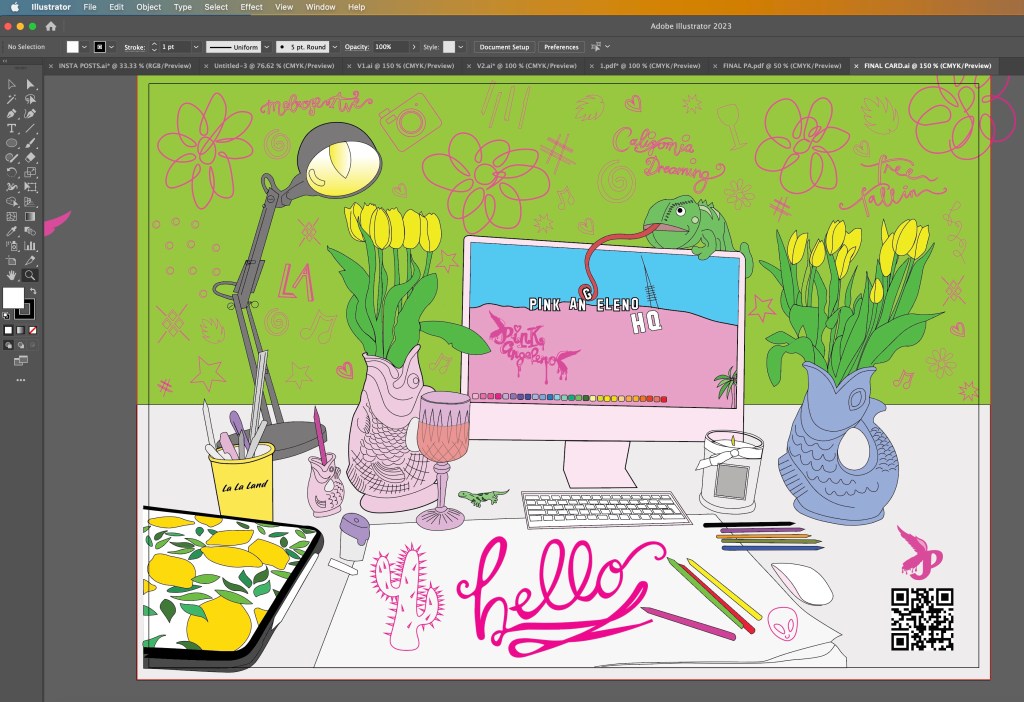
I also added a QR code onto it.. What better way to show who I am than a card with a direct link to my website? Instant promo and info on who I am.

My document was set up in Illustrator to an A5 size with a 3mm bleed.

I have never sent anything off for professional print before, but as I now work as a Graphic Designer in my new job, I have experience of sending artwork off to print with various print companies. One of the companies we use is printed.com. I only wanted 1 printed card which not many companies can do without a minimum of 10 prints but printed.com were able to print just 1 of my cards which was ideal and saved me unnecessary, added expense.

http://www.printed.com

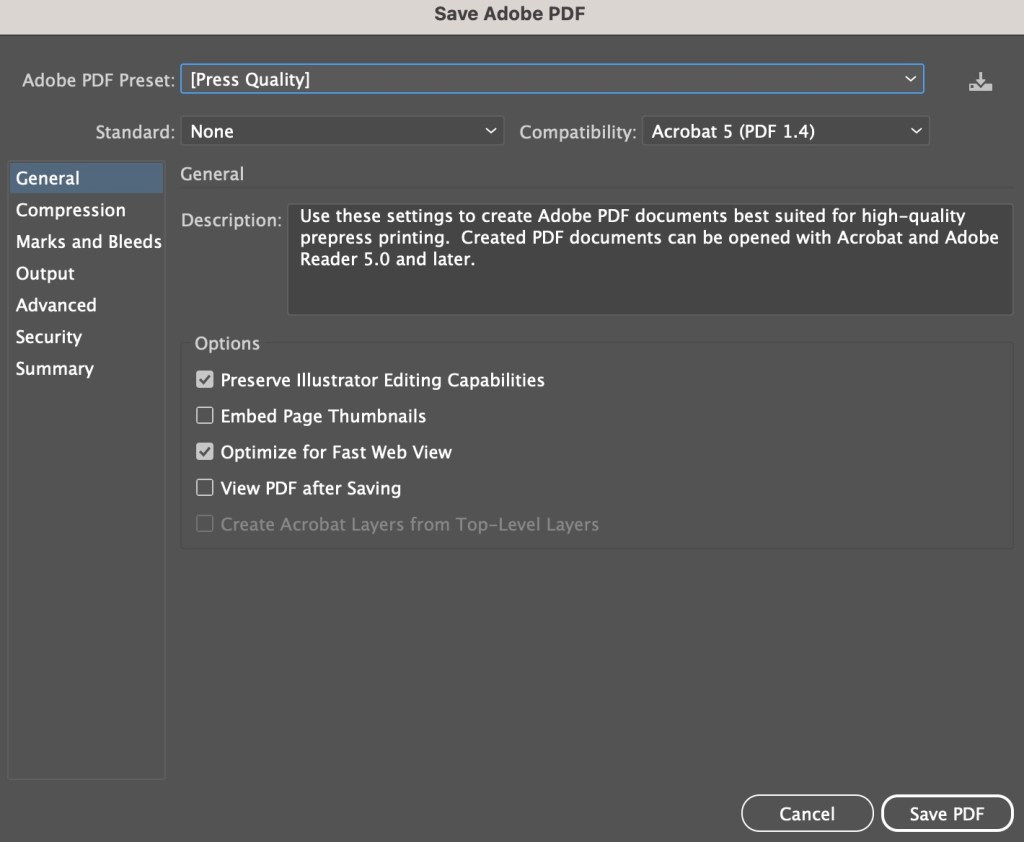
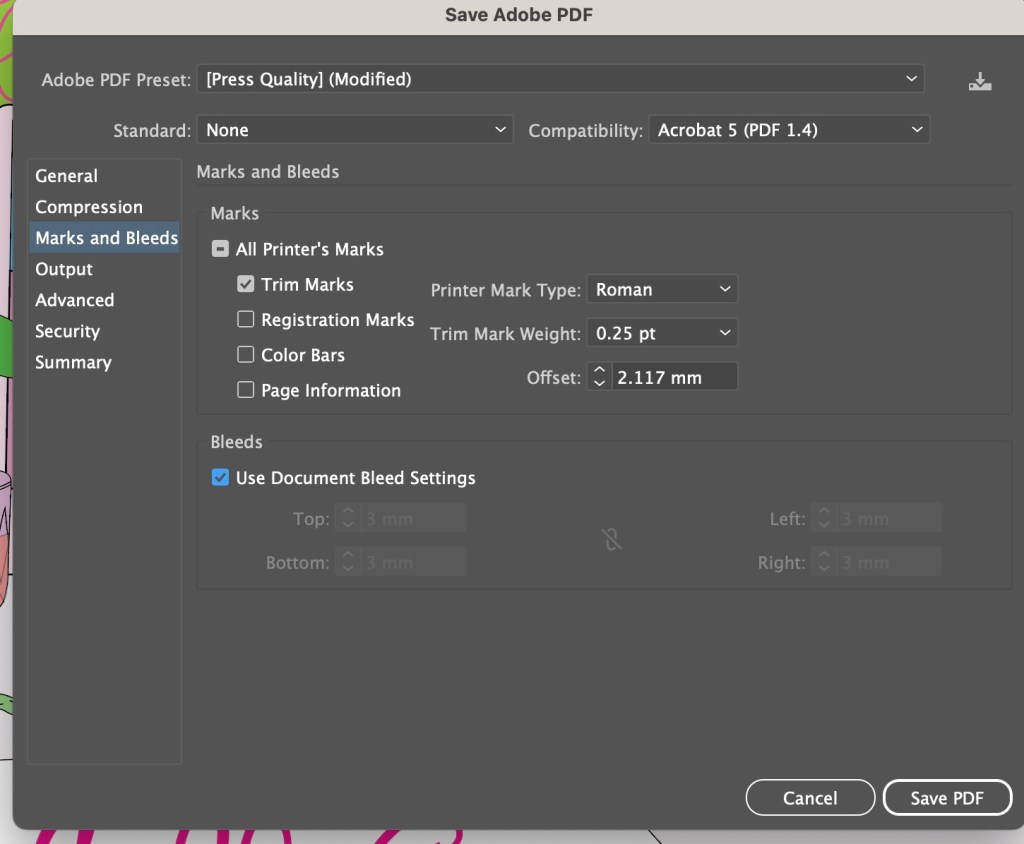
I set my card up for print in PDF format following these steps:

I then attached It and sent it off for print

It came back 4 days later and looked absolutely perfect!

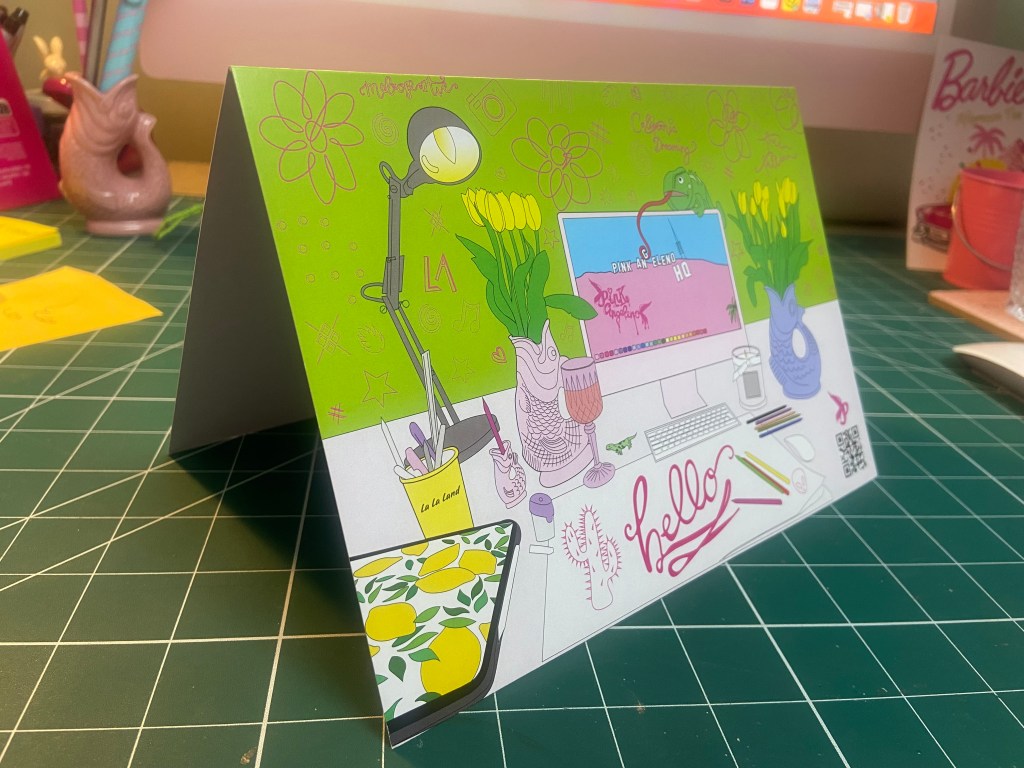
They even sent an extra copy which was really good!

The Final Card

Exercise 4: Designing a Cover

The Brief:

“A rat in a maze is free to go anywhere, as long as it stays inside the maze.”

Margaret Atwood, The Handmaid’s Tale, 1985

Following on from the discussion of George Orwell’s novel 1984, look at the covers for Margaret Atwood’s equally dystopian novel The Handmaid’s Tale (1985), in which a woman finds herself surviving inside a harsh American fundamentalist society that sees women’s roles as subservient cooks, matrons, and mothers. Alternatively, you can pick a different book to respond to but it needs to be one with more than one cover design so avoid recently published books.

Are there key conceptual motifs being used over and over again within different cover treatments?

Can you identify more expressive versions of the covers? Check the date of each version and try to speculate about the historical, political or social context for each one. (Don’t spend long on this but it’s important to realise that creative design doesn’t happen in a vacuum.)

Using one of the main motifs you have identified (such as the uniforms that feature in the book), the title of the book, author’s name, and no more than three colours (including black and white) generate as many different layouts of the cover design as you can. Think about how you can dynamically layer, organise, frame, clash, or balance these elements. Work quickly and come up with lots of different visual possibilities.

This is a similar exercise to the Lightbulb Project in Graphic Design 1, which aims to generate quick design possibilities by arranging your typography, motif and colours in as many, and as varied, ways as possible.

Use thumbnail drawings or DTP layouts to achieve at least ten fundamentally different layouts. This is a warm-up exercise that will help you with your approach to designing a cover for assignment two.

I really liked this exercise even though I had never heard of the book before I started this brief! As always I started off by doing some research into previous covers and reading a summary of the book to get a feel for what the storyline was about. I then found out that there is a series (4 seasons) that is streaming on Amazon Prime (which now I am HOOKED on!) so I also started watching that initially for some inspiration and to try and set the mood for my designs. It is a hard hitting, scary watch!- some scenes take your breath away and make your heart and stomach leap out of your mouth!

I started to research into existing covers on Pinterest which is always one of the best sources for visual references:

I also referenced anything I saw that gave me further ideas or that I thought I could use as inspiration in my designs.

There are lots of covers that have been designed for this book; most of them reference the Handmaid with her red dress and bonnet. This was the main motif that was used but I wanted to try and come up with more expressive designs that people had not yet explored.

One of the images that gave me inspiration was this one that I found on Pinterest:

This illustration is from a 2012 copy of The Handmaid’s Tale although it reminds me of something that has come out of a Sci-fi book from the 1960’s/70’s as it feels like it has a futuristic feel to it! The illustration shows a pregnant Handmaid who is looking down at her tummy. When I saw this illustration and looked at her belly, in my head I saw a round, Red circle and I knew this is what I needed to try and use in my designs. I knew I wanted to try and depict the red Handmaid but bring in the fertility element of the storyline.

After doing research on different books in the previous exercise, I had an idea of what I liked and didn’t like and knew that I wanted a very sharp, clean, minimalist cover. The brief also asked that we used limited colours so I knew that an intricate design was out of the question. From doing the previous exercise and researching Suzanne Dean and her award winning minimalistic cover of The Handmaid’s Tale I knew I wanted to take inspiration and draw ideas from this.

I started to sketch some initial ideas in my sketchbook. I was trying to make the designs as minimal as possible- stripping them right down to their bare essentials- the basic shapes and layout.

Some of the ideas I came up with were winners and helped me to go forward and develop the ideas but a lot of them just didn’t work! The third along at the top was supposed to symbolize a pregnant tummy but just ended up looking like a droopy boob!! The ones that worked the best are the most simple. I liked the black that I used as the outline silhouette of a woman’s body. I was playing around with the idea of negative space within a design at this point. I then had the idea to depict the unborn child (first in foetus stage) and then just using the bonnet to depict the unborn female in the womb. I also used small red circles on the earlier designs to depict nipples; I wanted to push boundaries and design outside of my comfort zone. The book is all about exploiting women and stripping women of their freedom and their rights and I know that in todays society “free the nipple” is quite a controversial movement! I wanted to advocate this in my design and do more or less the opposite what the book storyline doesn’t do! However, I did reframe in the end from using them in my final design 1) because when I removed them it allowed for negative space at the top of the design and didn’t distract the attention from what I actually want the readers to see and 2) because I felt it would be too much and sexualise the book; I didn’t want the cover to imply “sex” at all – I just wanted the cover to show the womanly, strong, female body and for it to represent the pregnancy storyline.

When I had more further ideas of what I was doing I then took the designs forward and developed them into more artboards- eliminating designs at each stage until I finally came up with a handful that I could choose and further develop and improve.

I also experimented with hand lettering because my original idea was to have floral branches and twigs coming out of the pregnant tummy and then evolving into the authors name at the top. I wanted the design to be very feminine and hand lettering just allows a more softer approach that by using typography.

I did change the design from that which I drew above though; instead of having the branches and twigs coming out of the thigh and pregnant belly I had the idea to include the ovaries and make the twigs and branches come out of them instead! I took a key motif (the bonnet) and changed the context of it slightly by making it form the 2 ovaries. I really like this idea because it is using one of the obvious key motifs but using it in such a way that is more expressive and different.

This is a screenshot of the hand lettering I drew from my design above using Illustrator.
This is a screenshot of my artboards in Illustrator.

I experimented with hand lettering but also with typography; I wanted to do some design ideas that used typefaces. I was torn between two; Bebas Neue and Didot. Bebas Neue is a Sans-Serif and is very condensed. I initially thought I wanted a sans-serif font that comes across non-expressive, Bold and abrupt but then I thought about the womanly cover and decided that a much softer, feminine typeface would be needed. Didot was the perfect choice! It is a serif font and appears soft and feminine but it is also a lovely, attractive typeface to be able to read (It is popular in glossy fashion magazines!). I then experimented with the leading of the text; I like the tight, condensed look of Bebas Neue but I did think that from a distance it would make it difficult to read if the leading was too tight. I opted for Didot and gave it a much more relaxed, spacious feel.

I then developed on the artboard ideas further and experimented with different variations of the typography etc.. I eventually realised that I liked the versions I had done using Didot and with the authors name above in small. I experimented also with colour; the brief specified we were to use no more than 3 colours and the ones I originally experimented with were Red, Yellow and Black. The yellow worked perfectly for the typography as a clash of colour against the rest of the design. It allowed the title to stand out on its own. The red represents the book and the Handmaid and I felt gave it a very communist feel (which actually wouldn’t be too far from the storyline in the book!) Having such simple use of colour really allowed my designs to be striking, clean and really stand out. The colours also contrast each other beautifully.

Just for further feedback and reassurance I printed the artboard pages out and asked my colleagues which ones stood out the best to them. They all agreed with the ones I had chosen as my favourites and these were the ones I took forward. I know that I did not have to produce a final design or cover for this assignment but I enjoyed the exercise so much and really liked my design outcome that I wanted to make it into a final piece for my portfolio and my Instagram account. When I was mocking the designs up, I decided that I liked both versions and wanted both to appear in my portfolio and on my Instagram for comparison so I included both. I do however prefer the version without hand lettering and this would be my choice of final design.

I mocked them up onto a square hardbook book – I had the idea in my head of making a square book as this would allow for more space on the cover:

I then mocked them both up onto a paperback edition:

However, because I had designed my design to fit a squared cover I did lose some of the negative space from my original design. I still like it though!

The final designs:

Responding to tutor feedback

My overall feedback for this exercise was really good! One of the things that my tutor mentioned in her feedback though which really let me down was that she thought I hadn’t done any first initial sketches before I took it through to digital – it was so frustrating because I did! (*massive crying face right now!) I just totally forgot to import the photo of my sketches onto my original post!!!

So, here they are! (better late than never!)

My tutor also commented on my questionable choice of a square book.. which actually now looking back from a few months ago when I completed this exercise I actually completely agree with her. It is unusual to find a squared book unless it is a children’s softback or hardback. I think at the time I massively struggled to find a free A5 decent paperback and hardback mockup online so ended up with the square version!- poor design choice!

Therefore I rethought my decision and mocked my book up nicely onto an A5 mockup:

My tutor then let me know in her opinion she preferred the version of my design where I used hand lettering as it made the book come across more feminine. I totally agree!- I think I just doubt my decisions sometimes and struggle to make final decisions! I could rectify this in the future by doing surveys or something similar where people vote on the final design.. either that or by asking people to critique my work more! The best place to do this would be my workplace as they all have DT experience!

Another question that was highlighted was why did I make the decision to choose yellow as the colour for the type? – simply, I just wanted a contrast from the Red! Yellow and Red both work great next to black but contrast against each other!

Card 2 – Design development

The second card that I designed in my series was based around Debbie Harry (Blondie).

Debbie Harry is another iconic blonde of our time, she seemed suitable to use for one of the illustrations in my range of cards. One of Blondies most iconic songs is “Atomic” where the lyrics are: “Oh, your hair is beautiful” I decided to put a twist on this and use the lyrics as the message on my card but change it to “Oh, your hair is beautiful.. (in a hat)”. Debbie Harry was well known for wearing baker boy style hats and hats are ideal right now for covering dodgy isolation hair and roots!

All I needed to do at this point was to find a photograph online of Debbie Harry wearing a hat to be able to draw inspiration from and trace around.

This was the image that I found on Google and the beginnings of tracing around it using the pen tool in Illustrator!

This is exactly the same process as what I did with Marilyn. I traced around the image completely in Illustrator with the pen tool and just added colour, texture, tone etc! I wanted to represent Debbie Harry as true as possible from the “Atomic” music video and this image that I have found of her is not from that video.. therefore I had to find several separate images of her outfits to draw from. I did try and play the music video and screengrab from that but the resolution was too poor. In the music video she wears an iconic “Vulture” t-shirt, I searched online to find this logo to draw from.

These images below show the progress at this tracing out stage;

I actually found Blondie a lot more easier to draw out than what I did Marilyn. I don’t know whether that is because I was a little rusty from not illustrating for so long and now I have got back into the swing of things I have picked up pace?.. However, I am pleased with how she turned out!

This is my final finished drawing of Blondie;

Again, the same goes as with Marilyn – I need to research and come up with ways of how I am going to portray the message. As I explained in my previous post I want the text on the card to be in the same similar illustrative approach to the drawings… I am going to do a separate post to research my findings and document the design development around the rest of the cards.

Responding to Tutor feedback…

“Be sure to use photographic reference with care: for example, the image used as reference
for Debbie Harry doesn’t give you the clear information you need in relation to the folded
hand and visual info for the little finger. Identifying this type of issue means you just need to
reference the position, getting someone to model the position so that the fingers are not
distorted in their translation”.

I completely agree with the feedback that Bee gave me for this piece of work. Even though I have a qualification in Life Drawing, over the years my drawing skills have become a bit rusty!

I found a random image online at the time and I traced the fingers on the hand from that onto my drawing of Debbie Harry as the original photo of Debbie Harry I used as reference did not include her fingers. I tried to go back and find the image I did use to reference the hands and fingers from in my archive of photographs but sadly I did not keep it!

I have however taken this advice and used it in future exercises and assignments… for Assignment 5 I drew illustrations for a children’s book – in this me and my boyfriend modelled in photographs to use as reference and to give me an idea of scale for my own drawings! (I am so sorry Chris for including the photo of you topless ;D…I needed a reference for someone clutching something in their arm… the Pokemon toy got the short straw!)